

What you will accomplish
- Copy and test Shareable links (customer login, registration, public page, marketplace).
- Arrange the signed-in Customer app using the live preview.
- Choose Marketplace visibility if you list cars or products.
- Preview your Public website before you post the link.
- Turn on Community and the Website schedule widget only when you are ready.
Related settings live on other pages
- Logo and colors: Settings > General under Facility profile. The old Settings > Branding link opens the same place. See Set up your facility name, logo, and colors.
- Registration form and first-login steps: Settings > Customer onboarding — see Configure customer onboarding.
- Custom domain: Settings > Custom domain — see Connect a custom domain.
Before you start
- Complete Set up your facility name, logo, and colors so previews show your logo and colors.
- Review Connect payment processing before turning on paid signup or shop items.
- Review Configure communications before sending portal invites or registration emails.
- If you plan to place code on your website, know who manages your website (WordPress, Squarespace, Wix, and similar).
Open Website & customer app settings
Go to Settings > Website & customer app. The page title is Website & customer app.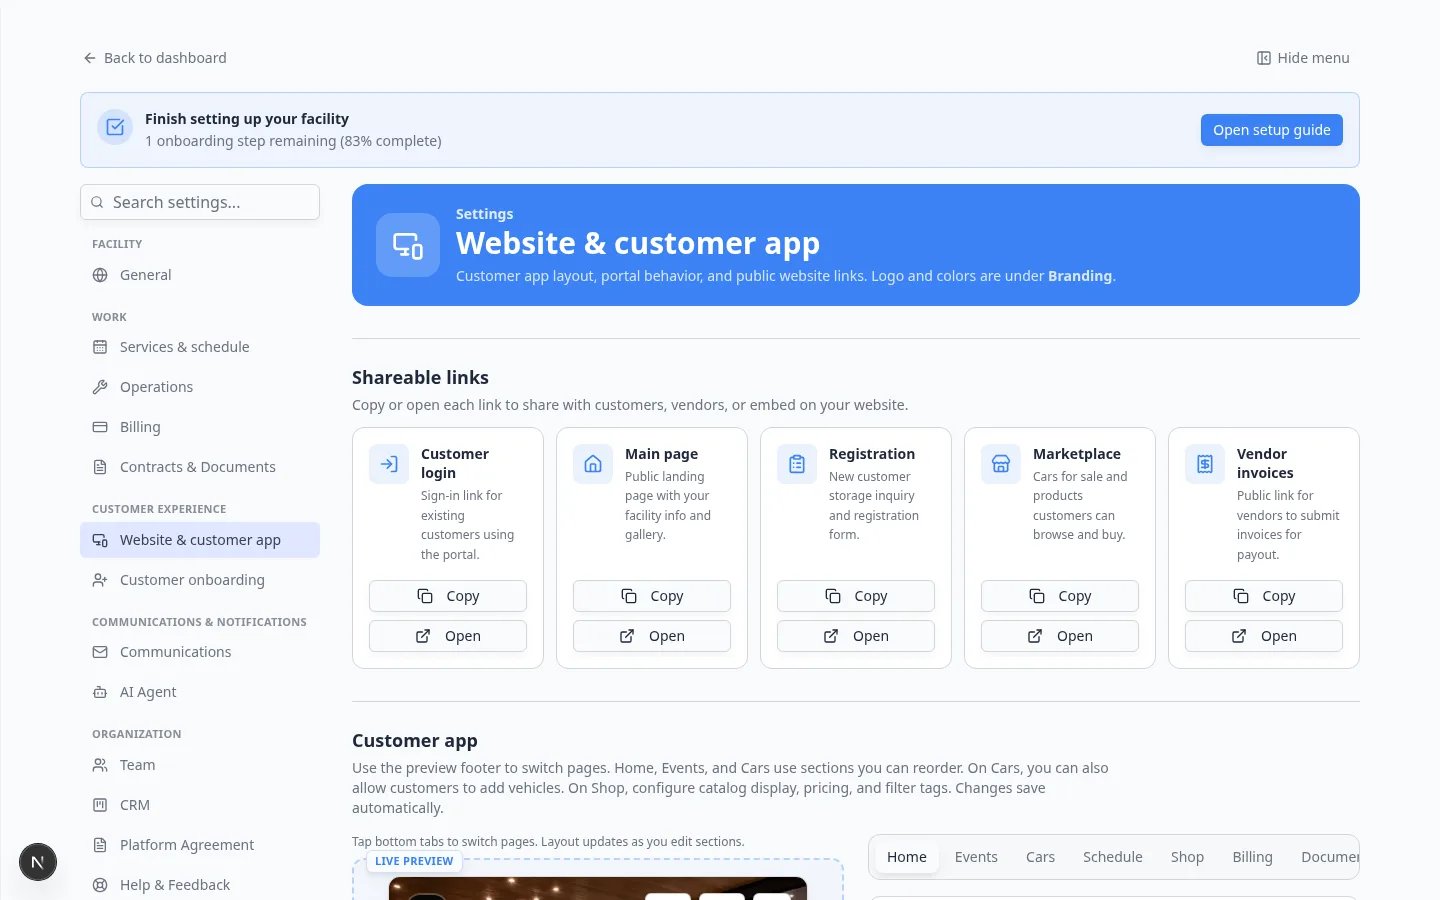
Copy shareable links first
Most teams start here because you need these URLs for emails, your website, and text messages.1
Find Shareable links
At the top of Settings > Website & customer app, find Shareable links.Common cards include:
- Customer login — sign-in for existing customers
- Main page — your public landing page
- Registration — new customer storage inquiry form
- Marketplace — cars for sale customers can browse
- Vendor invoices — a link for vendors to submit invoices
2
Copy the customer login link
On the Customer login card, click Copy.Why this matters: This is the link you send when you invite someone to the portal. It is not the same as your staff dashboard link.
3
Test in a private browser window
Click Open, or paste the link into a private or incognito window.Expected result: You see a customer sign-in page with your facility name and logo — not the staff Dashboard.
Set up the customer app
The customer app is the first page customers see after they sign in.1
Scroll to Customer app
Find Customer app under Shareable links.Use the LIVE PREVIEW and the page tabs (Home, Events, Cars, Schedule, Shop, and others) to switch pages.
2
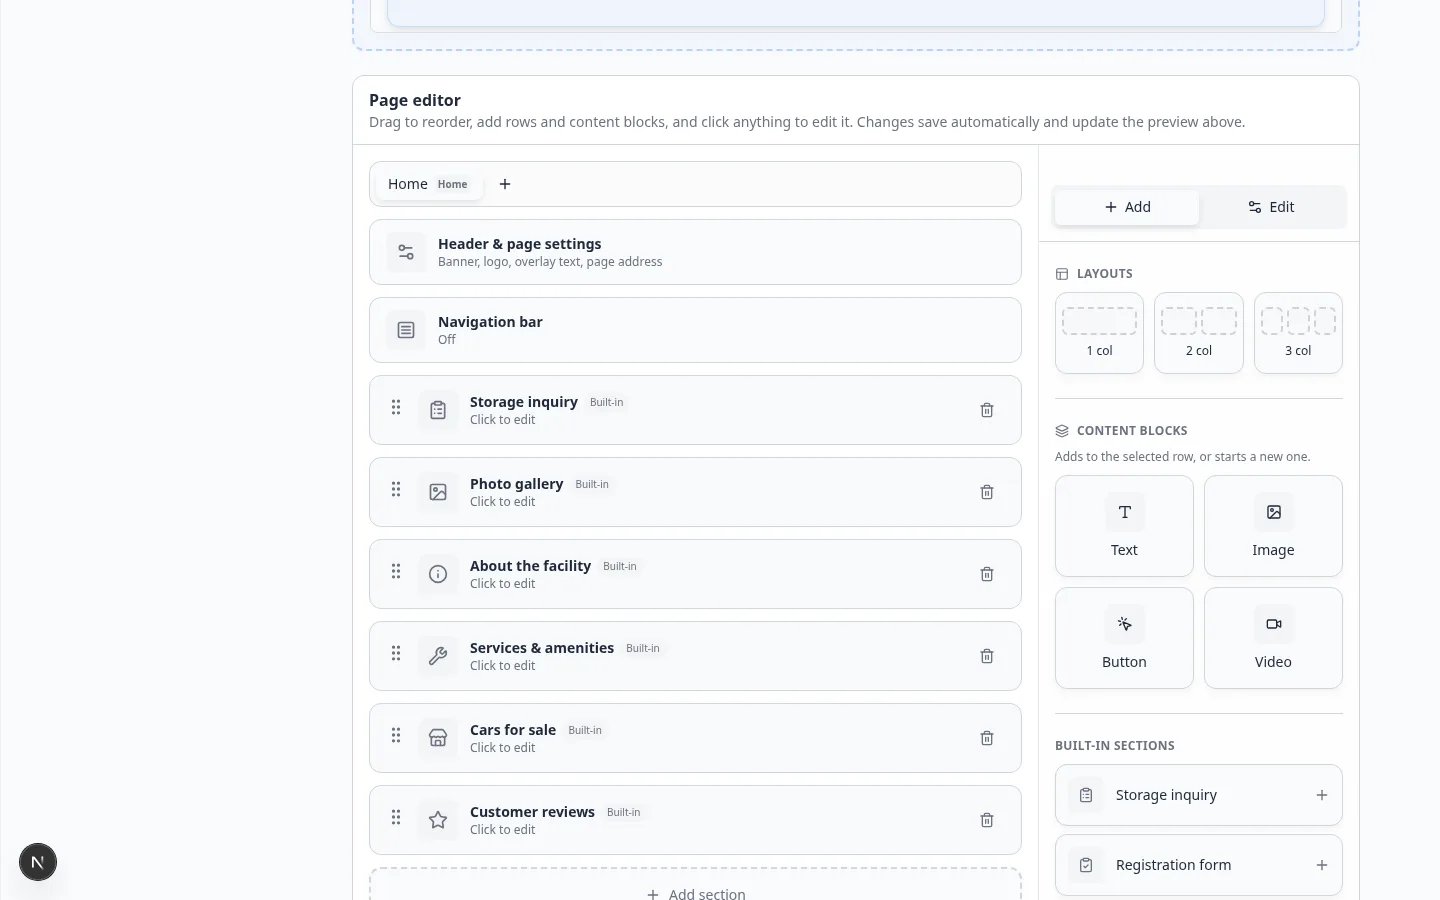
Reorder sections on Home, Events, and Cars
Turn sections on or off, then drag them into the order customers should see.On Cars, you can also allow customers to add vehicles.On Shop, configure catalog display, pricing, and filter tags.Changes save automatically.
3
Watch the preview update
Tap the bottom tabs in the preview to confirm each page.Expected result: The preview matches the experience you want before you send invite emails.
Set Marketplace visibility
1
Find Marketplace
Scroll to Marketplace.
2
Choose who can browse
Turn the marketplace on or off, then choose who can see cars and products.Choose Public only when you want guests (people who are not signed in) to browse.Expected result: The Marketplace shareable link matches the visibility you chose.
Configure the public website
1
Scroll to Public website
Find Public website on Settings > Website & customer app.
2
Turn the page on and check the address
Enable the public page and confirm the page address (often called a slug).Keep it short and close to your facility name.
3
Add public details
Add description, photos, services, and reviews your team wants customers to see. To reuse content from a previous website, add an HTML block (see Add custom HTML).
4
Preview before sharing
Open the public page in a new tab and confirm it looks correct.Expected result: A stranger can learn about your facility and find the right next step (register, browse cars, or sign in).
Control what customers see on each car page
1
Scroll to Car page
Find Car page.This controls which blocks appear inside the Vehicle Details card when a customer opens one of their cars.
2
Turn sections on or off
Show or hide photos, service history, documents, and market data.Turn off anything that should stay internal to your team.Why this matters: Some facilities share condition photos with owners; others keep inspection notes staff-only.
Add a website schedule widget
The Website schedule widget is a small embed you paste into a website builder such as WordPress, Squarespace, Wix, or Webflow.1
Scroll to Website schedule widget
On Settings > Website & customer app, scroll to Website schedule widget.
2
Copy the embed code
Click Copy to copy the HTML embed code.
3
Paste on your website
Send the code to whoever manages your website, or paste it yourself into an HTML or embed block.Expected result: The schedule widget loads on your public website and lets customers book without calling first.
Turn on Community chat (optional)
Community lets customers join chat channels your team manages in Marketing & Events.1
Find Community
Scroll to Community.
2
Turn Community on only when you are ready
Turn it on when you have at least one channel and staff who can monitor messages.Then create channels in Marketing & Events > Community. See Manage community channels.
Set registration and onboarding (quick pointer)
Public registration and first-login steps live on their own Settings page:- Public registration form: Configure customer onboarding.
- Steps after sign-in: same guide, Customer app onboarding section.
- Approve new registrations: Review and approve registration requests.
What success looks like
- You copied and tested the Customer login link in a private browser window.
- The customer app preview shows the sections and tabs your team wants customers to use.
- Marketplace visibility matches who should browse cars and products.
- Your public facility page looks ready before you share it.
- Community and the schedule widget are on only when staff can support them.
Troubleshooting
What to do next
- Set up registration and first-login steps in Configure customer onboarding.
- Invite a test customer first, then follow Invite a customer to the portal.
- Use Go-live checklist for public pages before marketing your public links widely.