

What you will accomplish
- Open the Results page for any custom form and read individual answers.
- Use summary charts to see which multiple-choice answers are most popular.
- Download a CSV spreadsheet to share with your team or import into another tool.
- Know when to close a form that has enough responses.
When to use this guide
- Responses are coming in and you need to read them or count how many people answered.
- You want to see which multiple-choice options are most popular.
- You need a spreadsheet for a manager, mail merge, or follow-up calls.
- You are deciding whether to close a form that reached its response goal.
Before you start
- The form exists on Marketing & Events > Forms.
- At least one person has submitted the form (use a test submission if you are still setting up).
- You know which form you need—the Forms list shows the response count in the Responses column.
Step 1: Open the Forms list
1
Open Marketing & Events
Go to Marketing & Events.
2
Click Forms
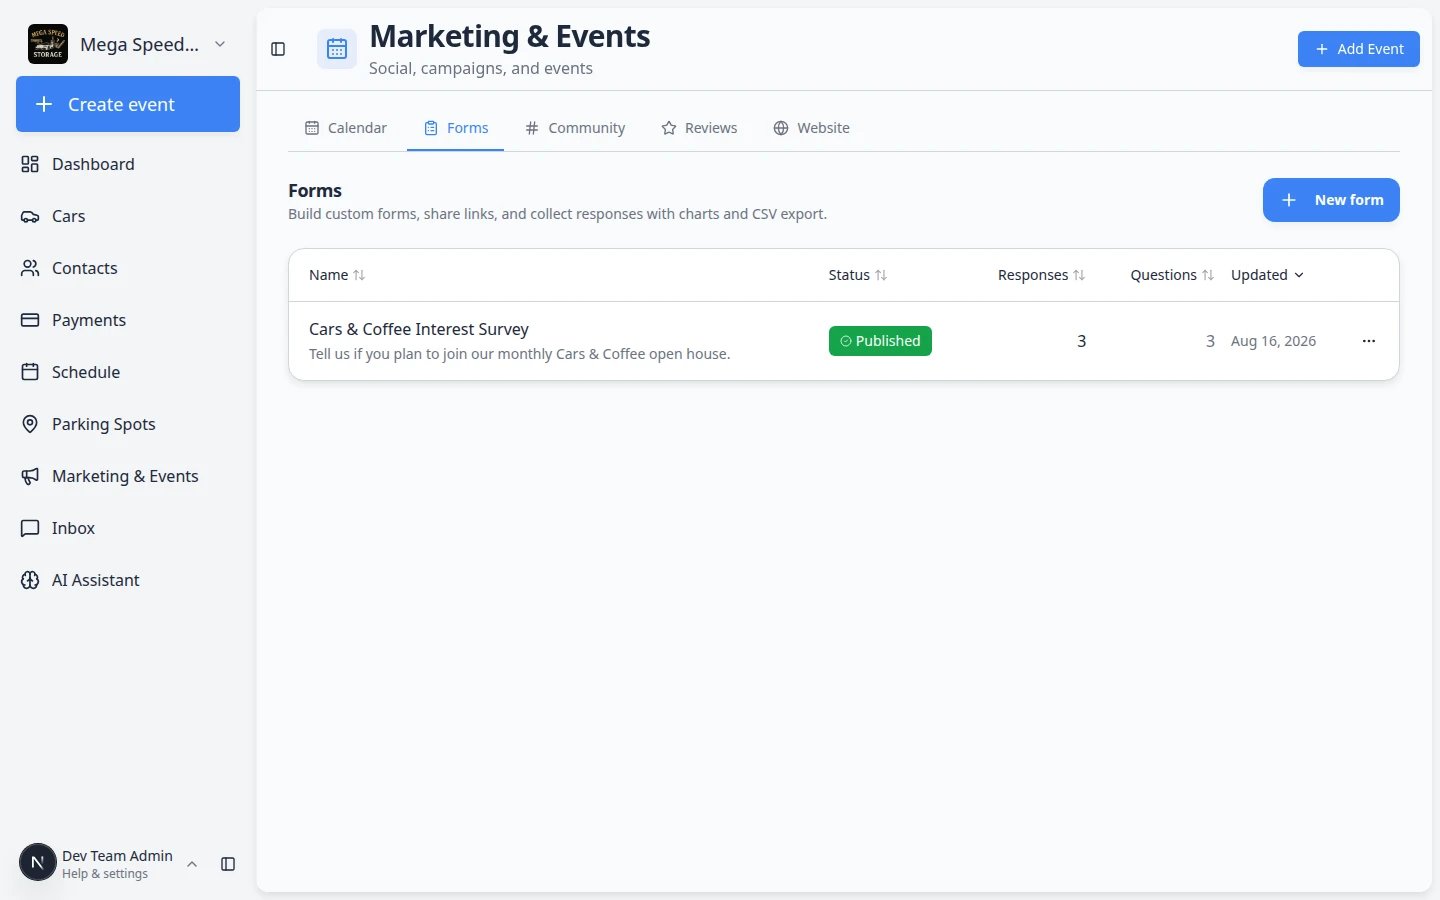
Click the Forms tab, or open Marketing & Events > Forms directly.Expected result: You see each form’s name, Status (Draft, Published, or Closed), and Responses count.
3
Find the form you need
Look at the Responses column to see which forms have answers waiting.Why this matters: A published form with 0 responses may need a reminder email or a corrected share link—not a results review yet.
Step 2: Open Results
You can reach Results in two ways—pick whichever is easier:1
From the form row menu
On the Forms list, find the form row you need. On the far right of that row, click the three-dot menu button (it may show as ⋯ or Form actions when you hover).In the menu, click Results (it has a small chart icon next to it).Why this matters: This is the fastest path when you are on the Forms list and just need answers—not the question editor.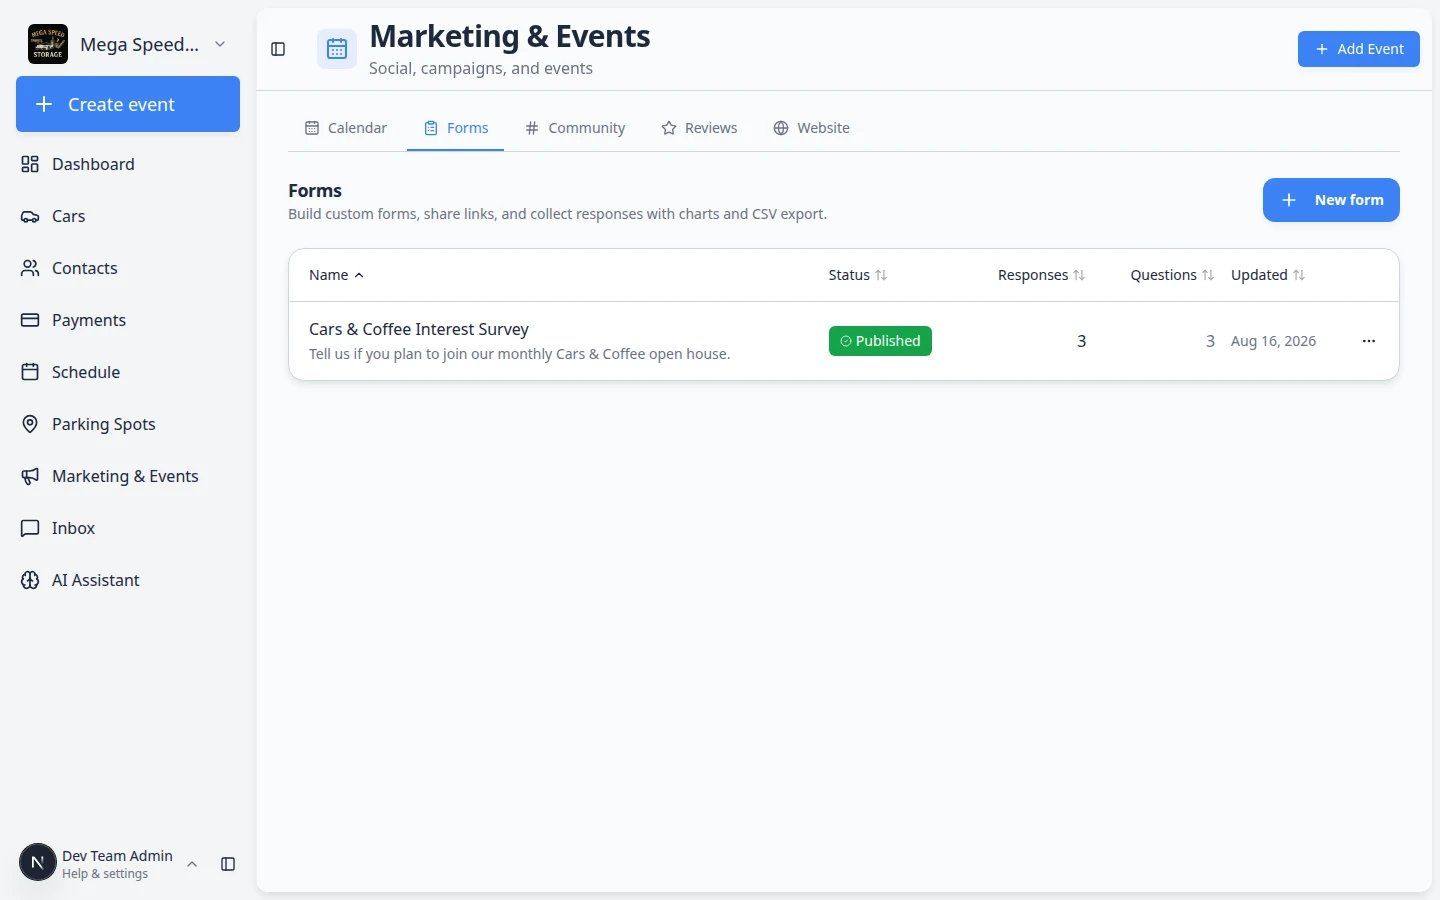
2
From inside the form editor
Open the form from the list (click the form name), then click Results near the top-right of the editor (next to the Published switch).Expected result: Same Results page with charts and a response table.
Step 3: Read the summary and charts
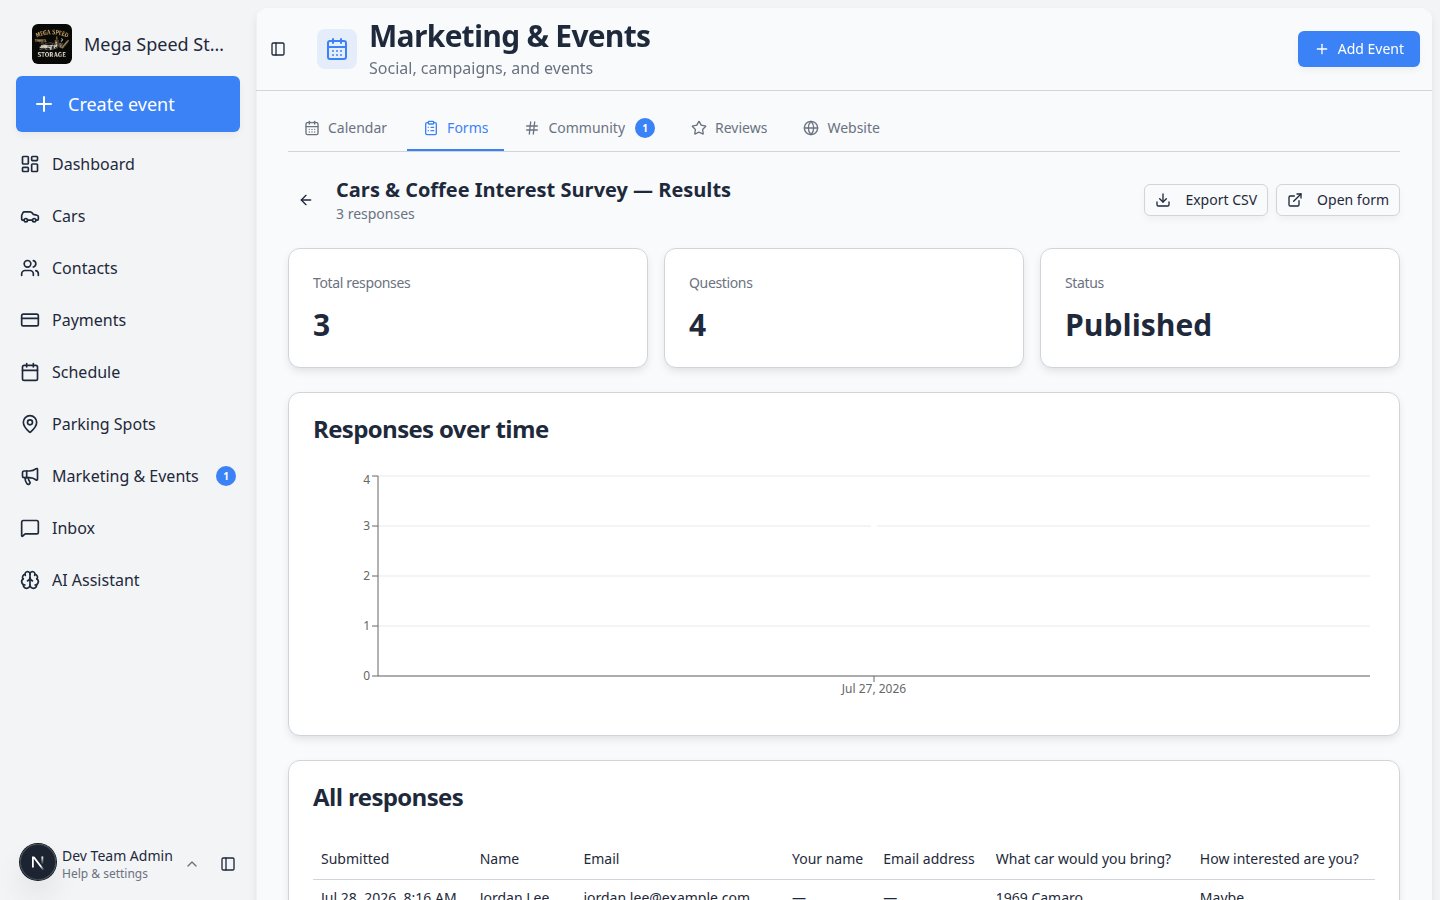
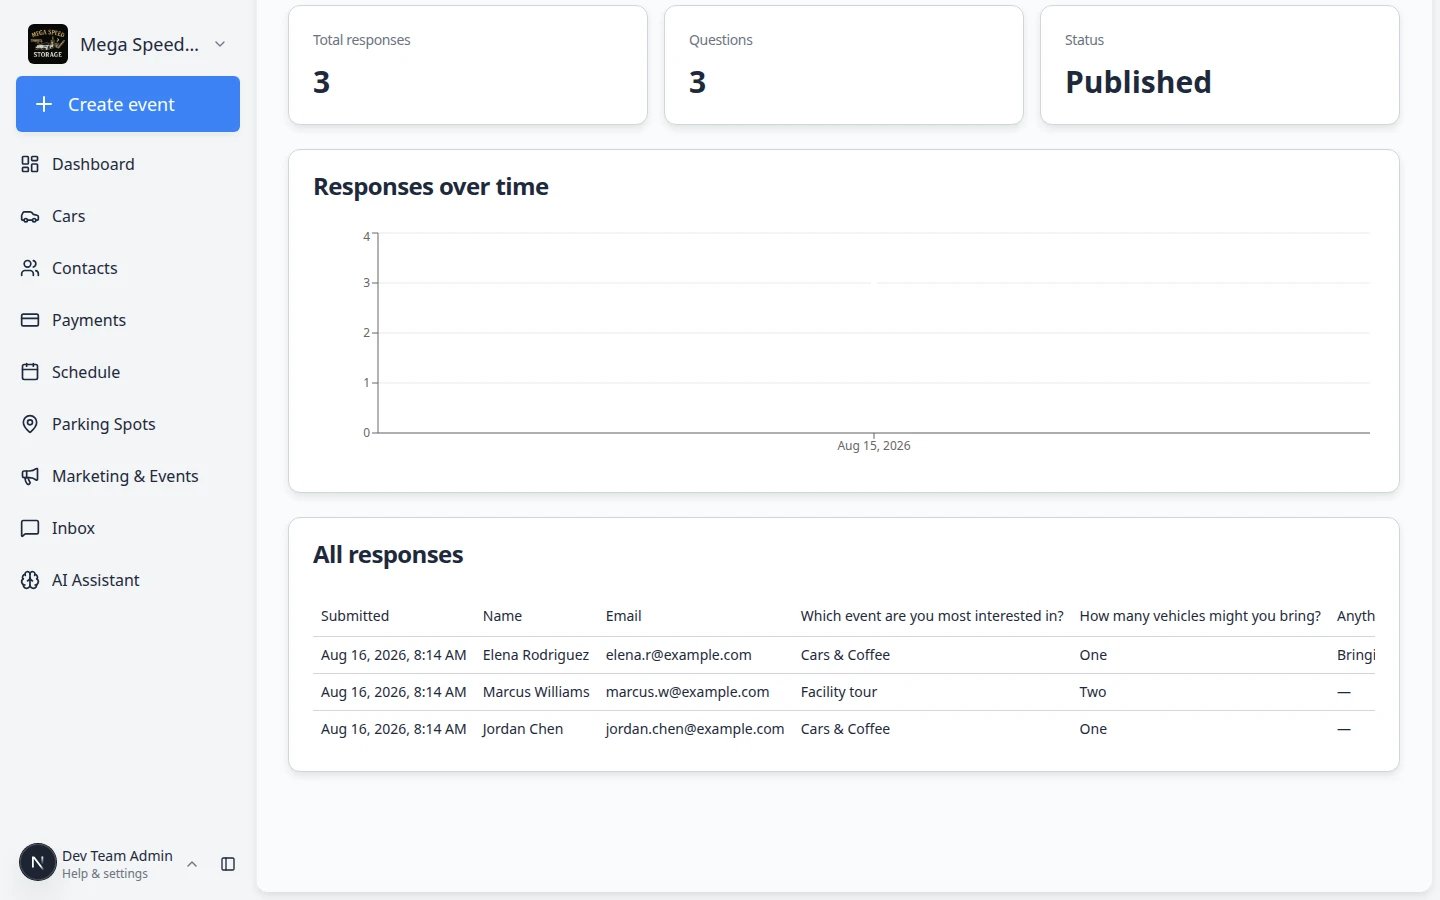
The top of the Results page answers two questions fast: how many people responded and what did they choose most often.1
Check the response total
Under the form name, read how many responses you have. The count should match the Responses column on the Forms list.Expected result: You can tell a manager “we have 12 answers so far” without opening a spreadsheet.
2
Review choice-question charts
For single choice and multiple choice questions, bar charts show which answers were picked most often.Why this matters: A quick glance tells you whether customers prefer Saturday events, detail services, or another option—without reading every row.Tip: If one bar is much taller than the rest, that option is a strong signal for your next event theme or service offering.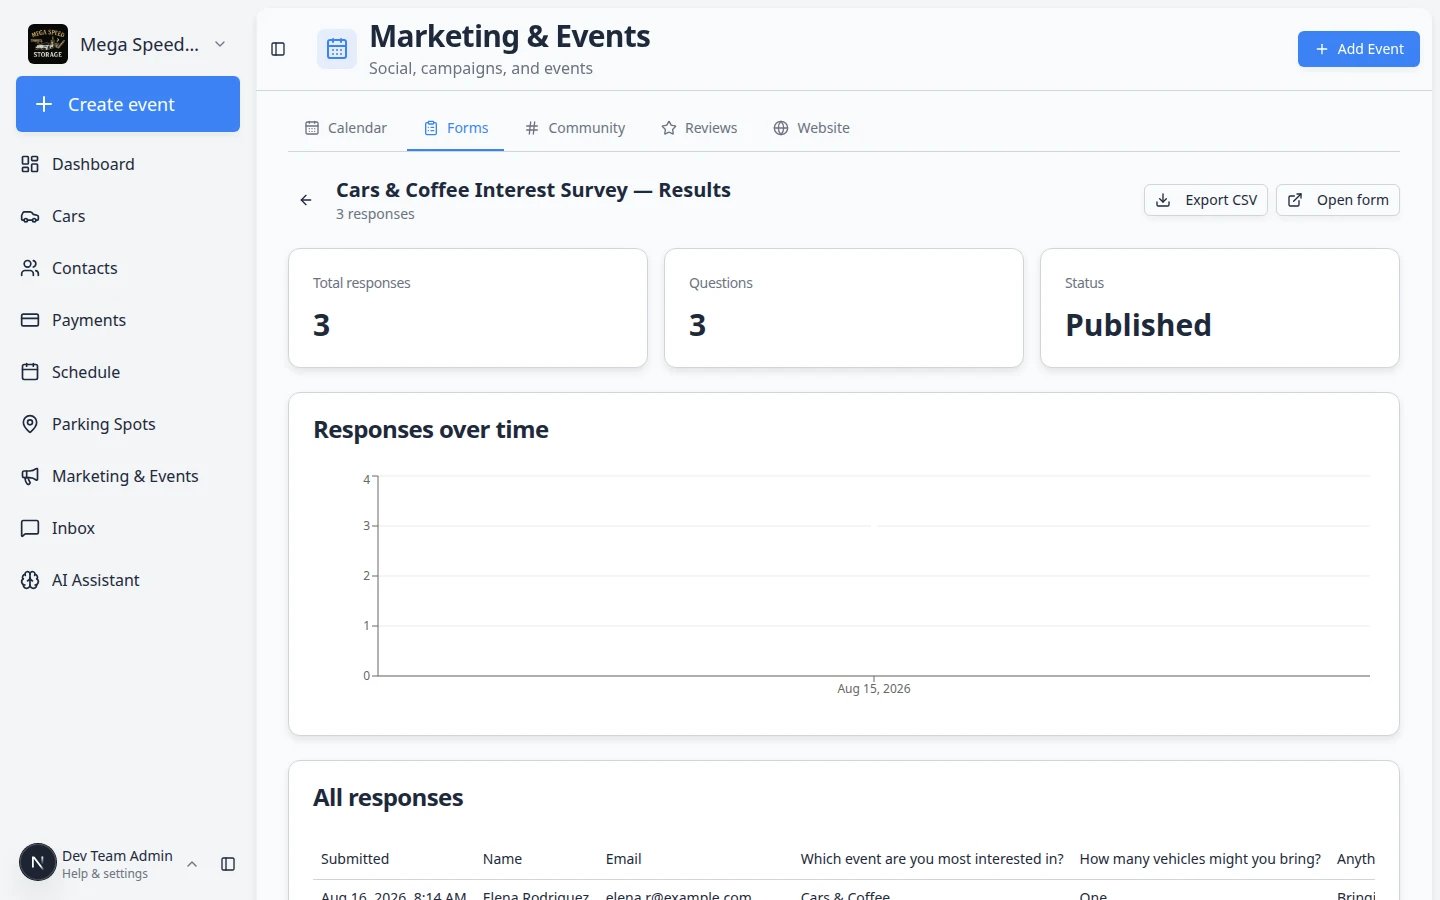
3
Review the timeline chart
When you have more than one response, a line chart shows when submissions arrived.Expected result: You can see if interest spiked right after an email blast, an open house, or a social post.Why this matters: A flat line after a big send may mean customers did not see the link—time to resend the form in a campaign.
Text answers do not appear in chartsShort text and long text questions show up in the response table below the charts—not in bar graphs. Scroll down to read those answers row by row.
Step 4: Read individual responses
The response table is where you read what each person actually wrote. Charts summarize patterns; the table holds the details.1
Scroll to the response table
Below the charts, find the table with one row per submission. Each row is one person who filled out the form.
2
Read each column
Each question becomes a column. The Submitted column shows when the person sent their answers. If the form collected Name or Email, those appear in their own columns too.Expected result: You can scan names, emails (when collected), and each answer in one place—without opening one response at a time.
3
Look for blank cells
A blank cell usually means the question was optional and the person skipped it. If a required question is blank, the form may have changed after they submitted, or they used an older link.Why this matters: Do not assume a blank answer means the customer refused to answer—check whether the question was required when they submitted.
4
Follow up outside the app
Use the name or email from a row when your team needs to follow up. Phone numbers appear in the CSV export when the form collected them. There is no Reply button on this page—use Inbox or your normal email when you need a conversation.Why this matters: Forms collect information; Inbox is for back-and-forth messages.
5
Turn answers into action
After you read the table, decide what happens next:
- Event interest survey — invite Going respondents with Create a social event or email them with Create a campaign.
- Waitlist — call or text the first few rows in the order they submitted (sort by Submitted column).
- Feedback — share a short summary with your manager using Export CSV, then close the form when the survey period ends (see Step 6 below).
Step 5: Export a CSV spreadsheet
A CSV file is a simple spreadsheet your team can open in Excel, Google Sheets, or Numbers. Use it when a manager wants a sortable list, when you need to mail-merge names, or when you want to share answers outside the app.
1
Click Export CSV
Near the top of the Results page, click Export CSV (it has a small download icon).Expected result: Your browser downloads a file named for the form.
2
Open the file
Open the CSV in Excel, Google Sheets, or Numbers. Each row is one submission; each column is one question.Why this matters: Managers and vendors often want a spreadsheet they can sort, filter, or print.
3
Export again after new responses
Run Export CSV whenever you need an up-to-date copy. The download always reflects the latest submissions.Expected result: New rows appear for answers that arrived after your last export.
Step 6: Stop accepting new responses (optional)
When a waitlist is full or an event survey period ends, close the form so new answers do not arrive.1
Open the form editor
From Results, click the back arrow, or open the form from the Forms list.
2
Close the form
Either flip Published off to save as Draft, or open Settings > Advanced and turn on Close form to mark it Closed.Expected result: The public link stops accepting new submissions. Existing responses remain on Results.
Common mistakes to avoid
- Do not open Results on a Draft form and expect customer answers—only Published forms collect responses.
- Do not email a CSV export to customers without checking privacy rules at your facility.
- Do not delete a form just to stop responses—use Close form or turn off Published so history stays on Results.
- Do not assume a blank table cell means the customer refused—optional questions can be left empty.
What success looks like
- Your team can open Results and explain what customers chose without guessing.
- Choice-question charts match what you heard from customers on the phone.
- You can export a CSV when a manager asks for the list.
- Closed forms no longer accept submissions but keep their history.
Troubleshooting
What to do next
- Create a campaign — email customers who have not filled out the form yet.
- Add a customer in Contacts — then follow up by phone or Inbox using names from the response table.
- Create and share a custom form — build another form for a different event or service.
- Marketing & Events overview — return to the full list of marketing guides.