

Setup Guide vs. onboarding wizardSetup Guide (Setup Guide) — a checklist with Set up buttons that jump to any settings page. Good when you want to pick tasks in any order.Onboarding wizard (Onboarding wizard) — a guided six-step flow (facility, customers, cars, contracts, billing, team). Good when you prefer one topic per screen after first sign-in.See Complete the onboarding wizard for the guided path.
Hub vs. step-by-step guideThis guide explains how to use the Setup Guide page and track progress.For detailed instructions inside each step, read Complete the onboarding wizard.
What you will accomplish
You will learn how to open the Setup Guide, read progress, open any setup step, and know when your facility is ready for daily work.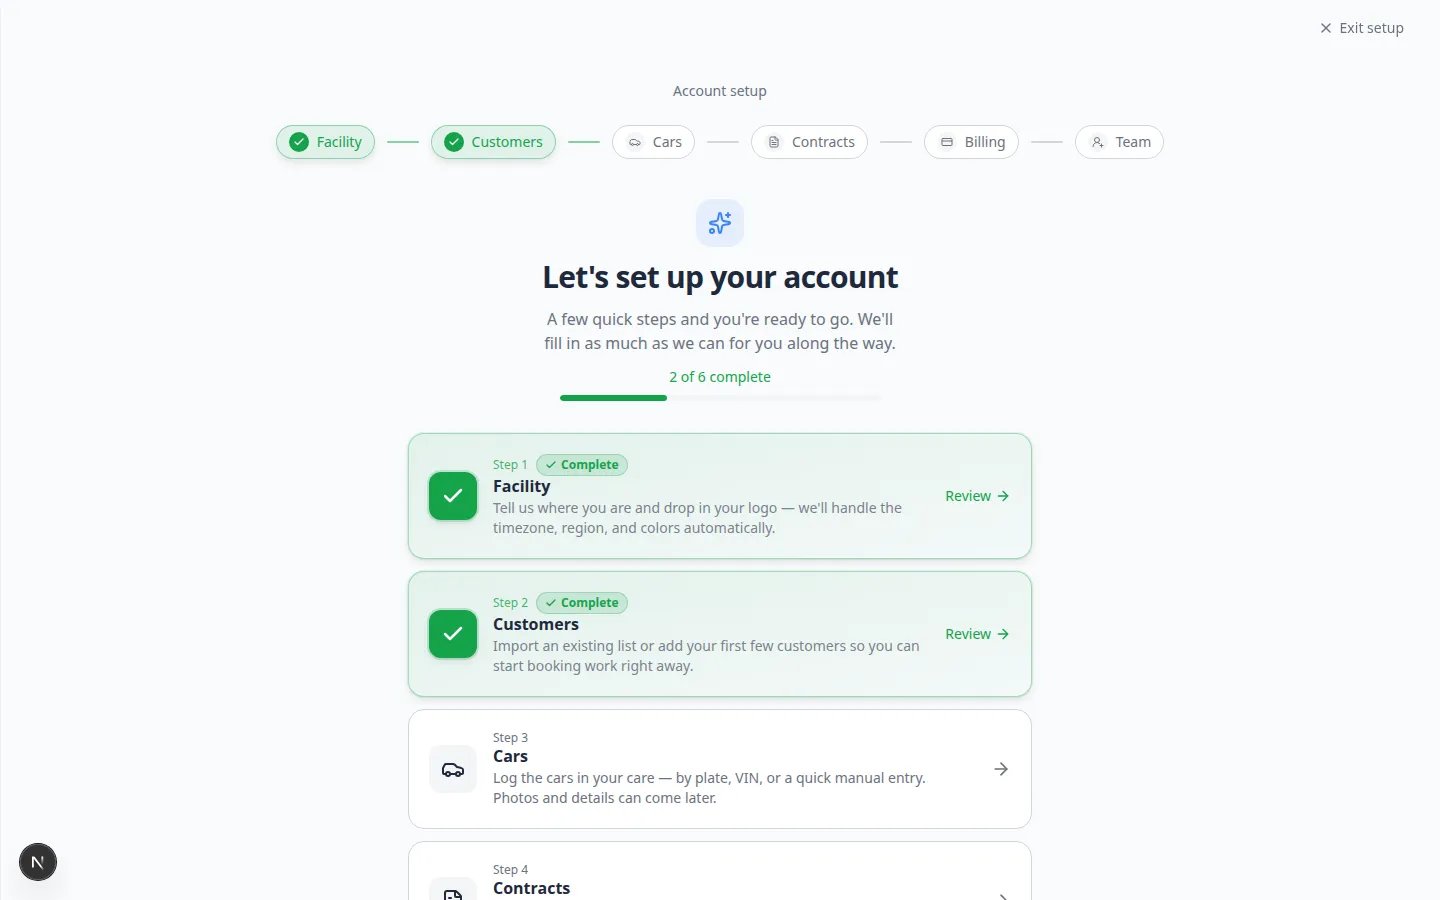
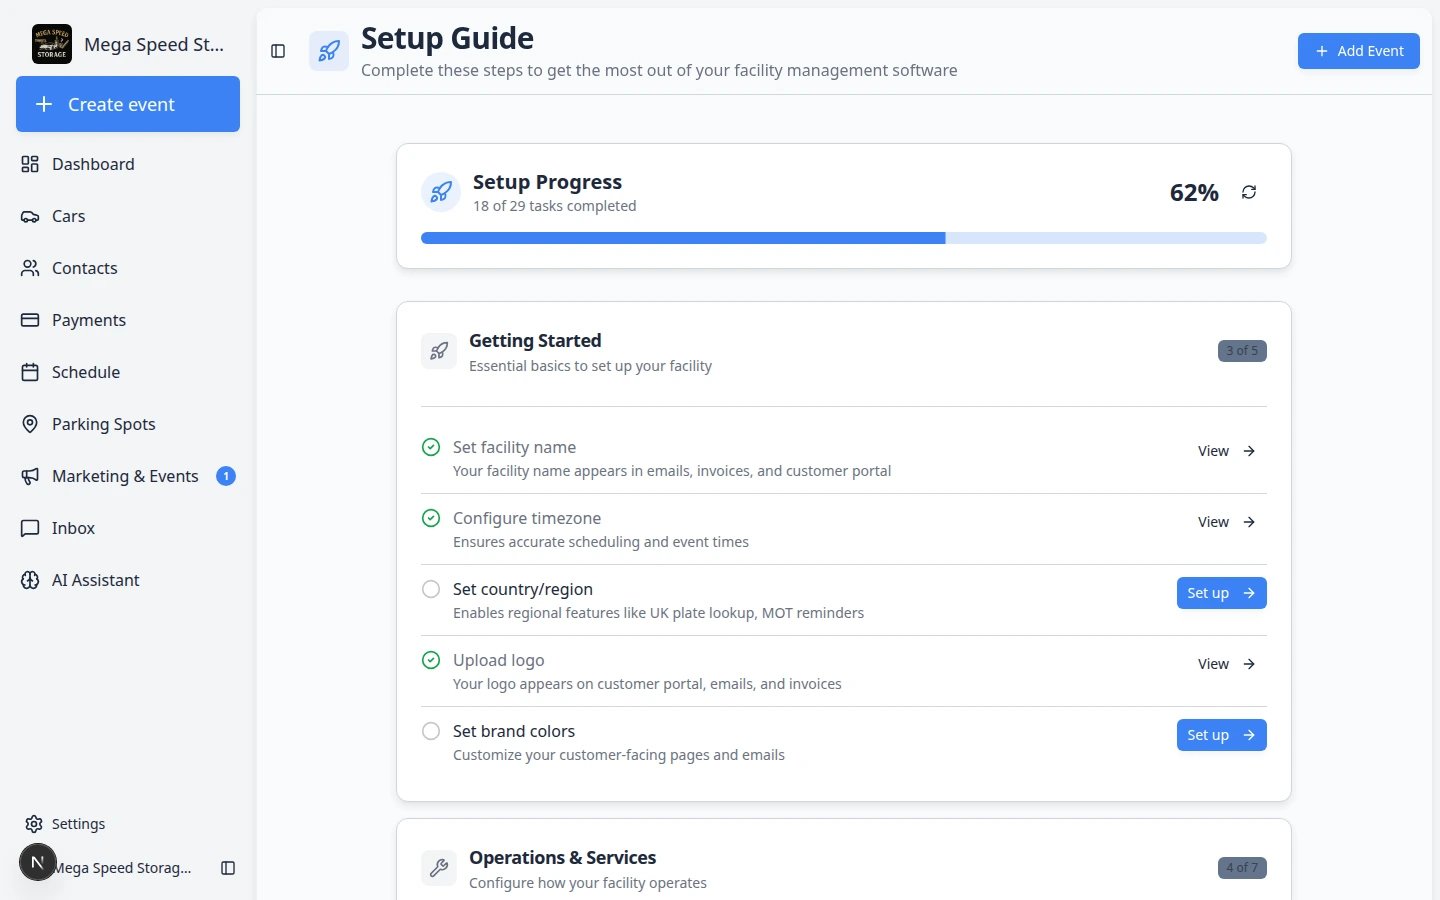
Before you start
- You need a staff login for your facility.
- Your account should have permission to update facility settings.
- If you are not sure about a setting, ask the facility owner or manager before changing it.
Open the Setup Guide
1
Sign in to the dashboard
Go to Create event or any staff page.Expected result: You see the main sidebar on the left.
2
Open Setup Guide
Use any of these paths:
- Click Setup Guide in the left sidebar (it may show a number badge when steps are incomplete).
- Open the direct link Setup Guide.
- On some settings pages, click Open setup guide in the banner at the top.
3
Read your progress
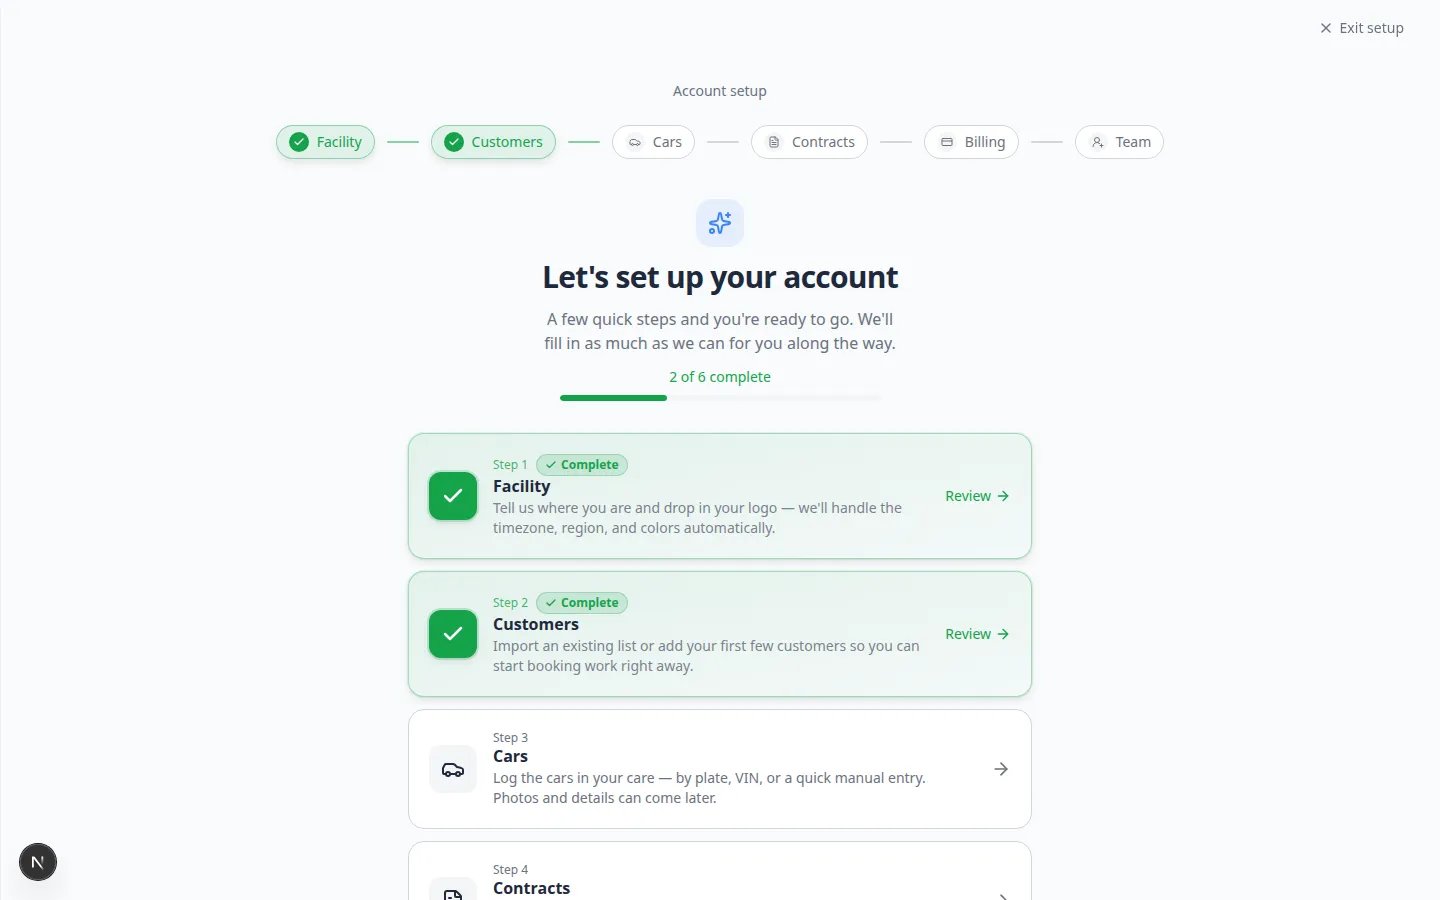
When at least one step is finished, the hub shows a progress line such as 2 of 6 complete with a green bar.Why this matters: You do not need to finish every step in one sitting. The hub remembers what you already completed.
Work through the six setup steps
Each card on the hub opens one setup area. You can start with Facility and move in order, or jump to whichever step your manager assigned.1
Click a step card
Click the card for the setup area you want to work on.Expected result: A focused screen opens for that topic with Save & continue at the bottom.
2
Complete the fields on that screen
Fill in the information you have ready. Use Skip for now on optional steps if your manager says billing or contracts can wait.Why this matters: Wrong public details can confuse customers on invoices, forms, and emails — double-check facility name and address on Step 1.
3
Save and return to the hub
Click Save & continue when the step looks correct.Expected result: You return to the hub and that card shows a green Complete badge.
4
Repeat until your manager is satisfied
You do not need all six steps before adding real customers and cars. Many teams finish Facility, Customers, and Cars, then return later for billing and contracts.
When the Setup Guide disappears from the sidebar
The Setup Guide menu item hides automatically after all six steps are marked complete. That does not mean setup is frozen — you can still change branding, billing, and team access anytime in Settings.Import existing customers and cars (optional)
If your facility already has a spreadsheet of customers or vehicles, you can import many records at once instead of typing each one by hand.1
Open Import settings
Go to Import Data.Expected result: The page title mentions import or bulk upload. You see options to upload a file or download a template.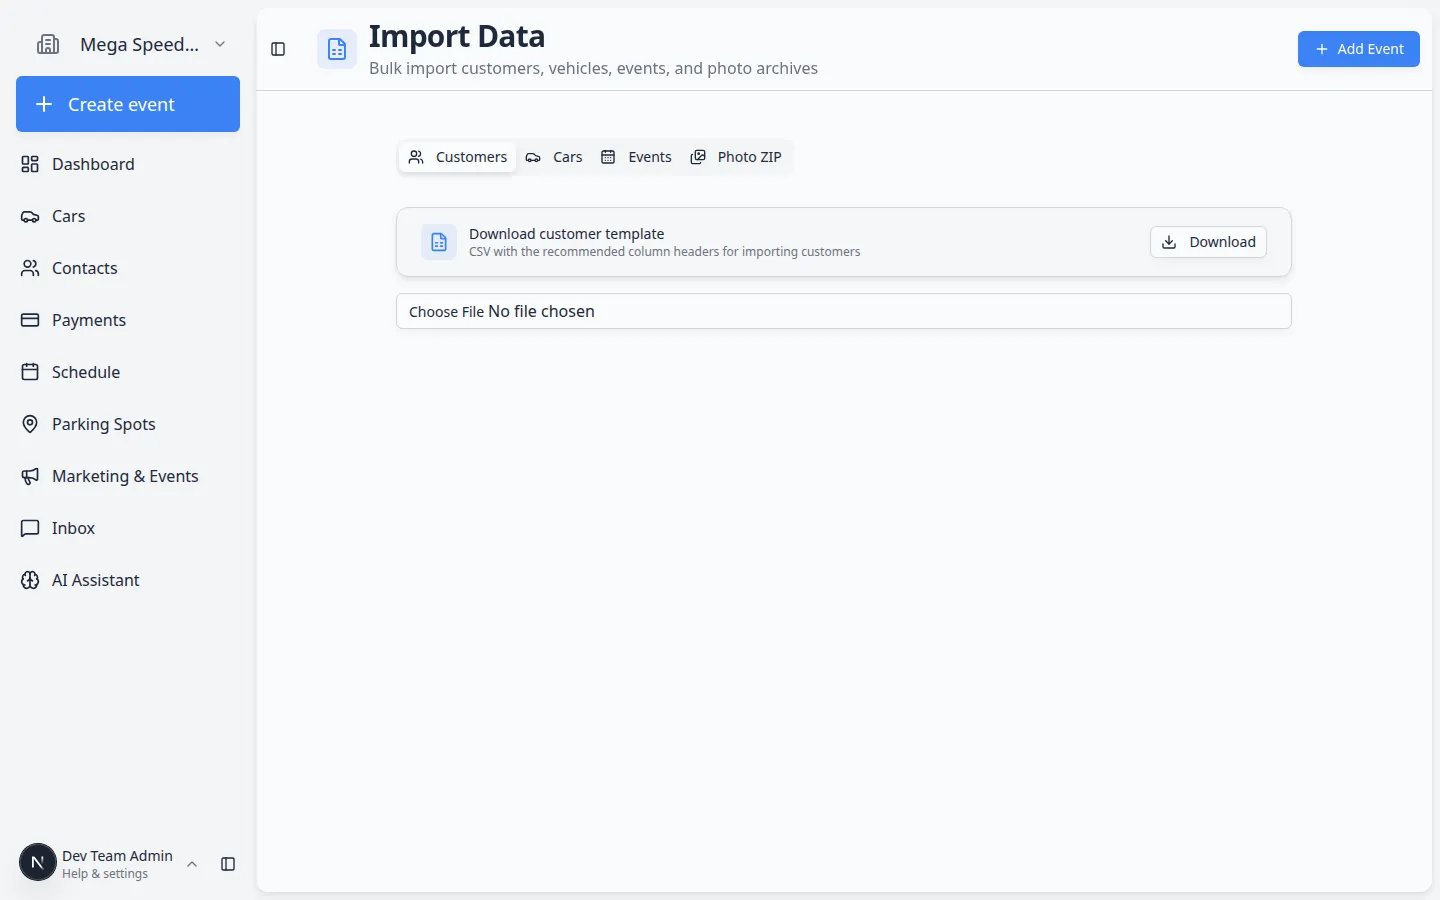
2
Download the template when offered
Use the facility’s template so column names match what the app expects.Why this matters: A mismatched spreadsheet causes rows to fail or create duplicate records.
Helpful tips
- Start with information customers will see: facility name, logo, address, phone, and email.
- Do not invite every teammate until core records and permissions are ready.
- Use Search your facility quickly (Ctrl+K or ⌘K) to confirm new customers and cars saved correctly.
- Keep setup notes in a shared place if more than one manager is helping.
Troubleshooting
I cannot find Setup Guide in the sidebarUse the direct link Setup Guide. The sidebar item only appears while onboarding steps are still incomplete.
What success looks like
- The hub shows green check marks on the steps your team finished (or your manager knows which steps are intentionally deferred).
- Facility name, logo, and time zone look correct on Settings > Branding and General.
- At least one customer and one car exist for daily practice.
- Staff can find records with Search your facility quickly.