

What you will accomplish
You will understand how Car Storage Software groups several vehicle agreements into one signing experience so a customer with two or more cars does not need separate emails for each storage agreement. After setup, the customer sees one onboarding step—Sign Your Contracts—and can finish every required agreement in a single browser session.When to use bundled signing
- One owner is storing two or more vehicles and needs the same storage agreement for each.
- You want the customer to sign everything in one sitting instead of several emails.
- Each vehicle already exists on the customer record in Contacts.
- Your contract template supports multiple vehicles (ask your facility admin if you are unsure).
How bundling works (plain English)
When onboarding runs and a customer has more than one vehicle on their account, the app can create a contract bundle:- The customer receives one signing experience (one Review & Sign Now button for the bundle).
- After signing, your team still sees separate completed agreements—one per vehicle—on the customer record.
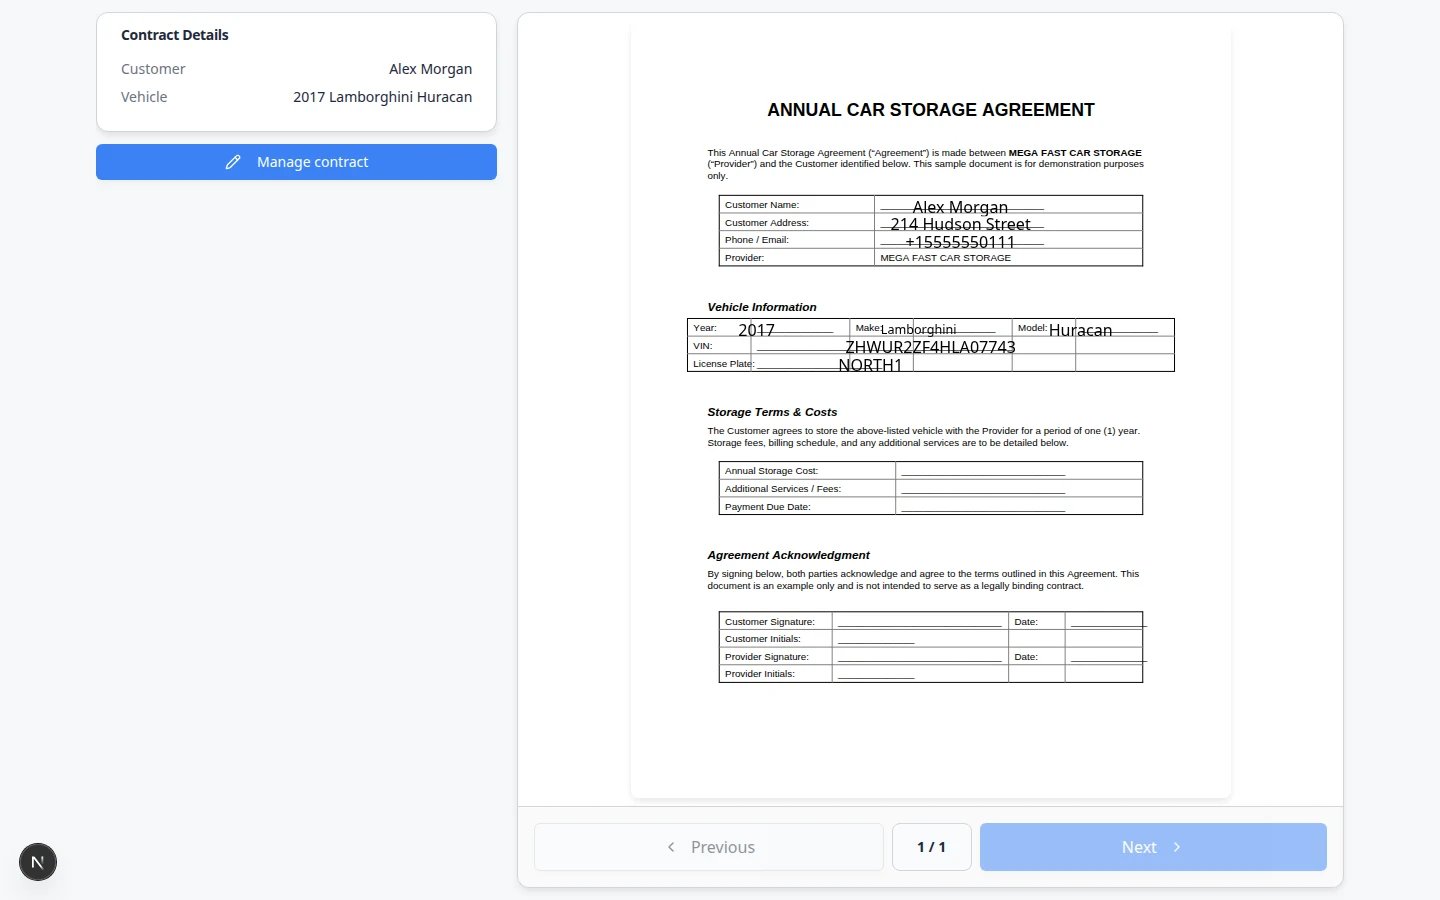
- Each signed PDF includes the correct car details for that vehicle.
Before you start
- Complete Create a contract template with vehicle fields (year, make, model, VIN, and so on).
- Every vehicle is on the same customer record in Contacts.
- Customer app onboarding is on and Contract Signing is enabled—see Attach contracts to customer workflows.
- The required template is selected in Contract Step Configuration and shows a Car-linked badge when it needs vehicle details.
- The customer’s email on the record is correct.
Step 1: Turn on Contract Signing for onboarding
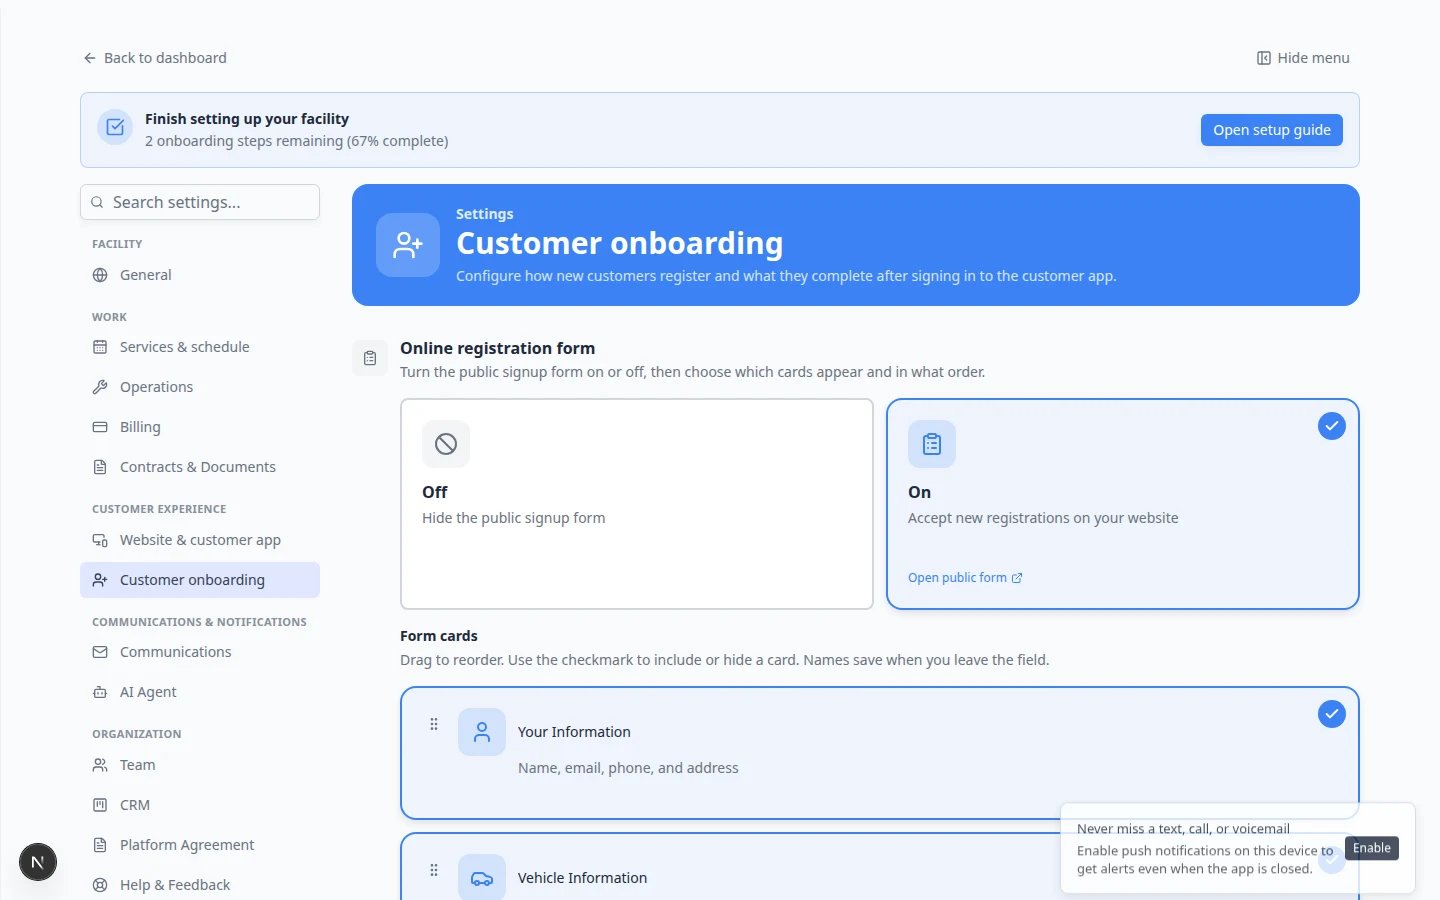
Bundled signing runs during customer portal onboarding, not from a special button on the staff send screen. Turn it on once in settings.1
Open Customer onboarding
2
Turn on Customer app onboarding
Enable Customer app onboarding at the top of the page.Why this matters: Without this master switch, new portal customers skip the signing steps entirely.
3
Enable Contract Signing
In Onboarding steps, turn Contract Signing on, then click Configure.
4
Select your storage agreement
In Contract Step Configuration, turn on the template every customer must sign—for example Car Storage Agreement.Templates with a Car-linked badge need vehicle details on the record before signing.Expected result: At least one required template is checked. Close the window when you are done.
Step 2: Put the Cars step before Contract Signing
Customers must add every vehicle to their account before they sign. That is how the app knows which cars belong in the bundle.1
Open Onboarding steps
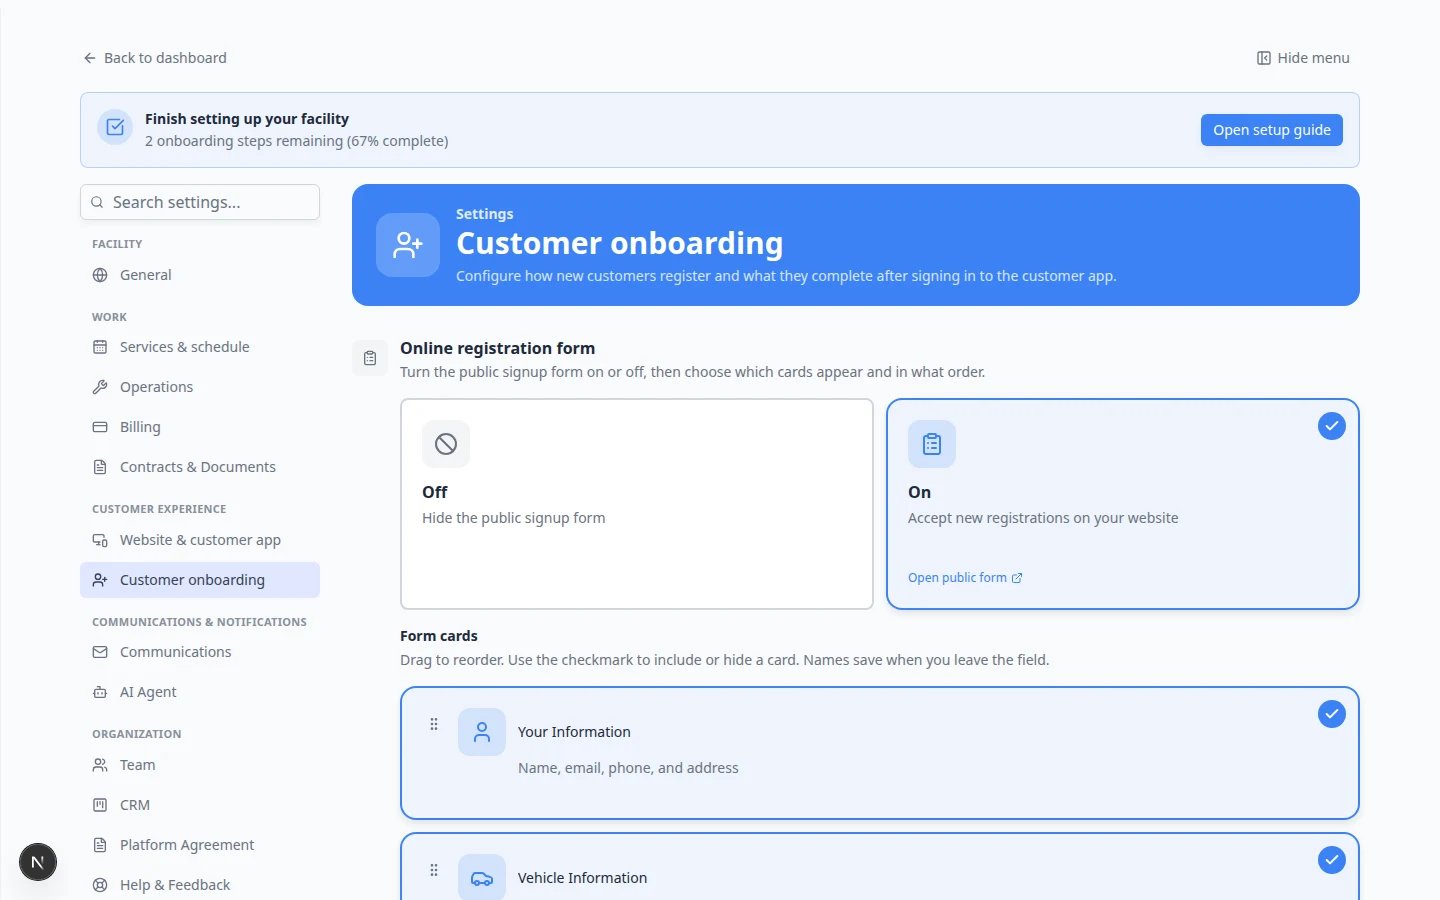
On Settings > Customer onboarding, find the Onboarding steps list.
2
Drag Cars above Contract Signing
Drag Cars (or Add Your Vehicle) above Contract Signing.Why this matters: If signing comes first, vehicle lines on the PDF may be blank and the bundle cannot include every car.
3
Save your order
Confirm the list saves. Many facilities use: Welcome → Profile → Cars → Contract Signing → Document Upload.Expected result: New portal customers add vehicles before they reach Sign Your Contracts.
Step 3: Add every vehicle on the customer record (staff prep)
Before you invite a multi-car customer to the portal, make sure their record is ready—or coach them to add each car during onboarding.1
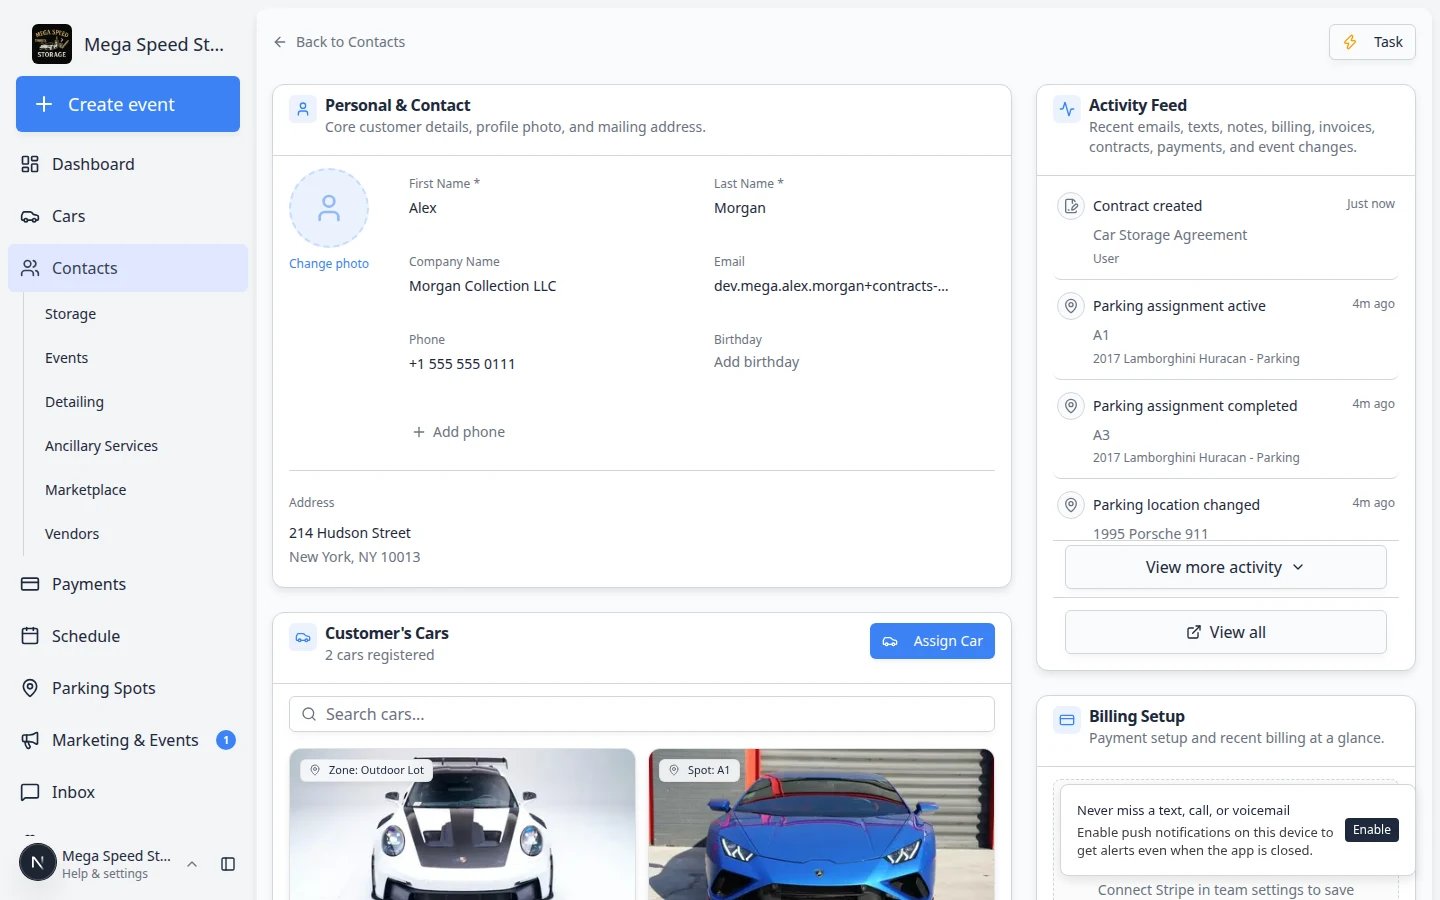
Open the customer in Contacts
Go to Contacts and open the customer who stores more than one vehicle.
2
Confirm each car is on the record
Check that every stored vehicle appears on the customer page. Add missing cars from Cars if your team enters them in the office.Why this matters: Onboarding can only bundle agreements for vehicles already linked to that customer.
3
Invite them to the portal
Send a portal invite using your normal process. See Invite a customer to the portal.Expected result: The customer can sign in and walk through onboarding—including adding any cars you did not enter for them.
Step 4: What the customer sees during onboarding
When the customer reaches Sign Your Contracts, the app groups every required agreement into one signing session.1
Find Sign Your Contracts
During onboarding, the customer sees Sign Your Contracts with progress such as 0 of 2 signed when two vehicles need the same template.
2
Tap Review & Sign Now
One button opens the browser signing page. The customer does not receive a separate email per vehicle during onboarding.
3
Complete every page and signature
They scroll through the agreement, allow location if asked, and sign once. The app applies that signing session to each vehicle in the bundle.Expected result: Progress updates to show all required contracts signed before Continue unlocks.
Step 5: Confirm on the customer record (staff view)
After the customer finishes onboarding, verify each vehicle has its own completed agreement.1
Open Contacts
Go to Contacts and open the customer who just finished signing.
2
Review Documents & Contracts
Scroll to Documents & Contracts. You should see one contract card per vehicle—for example two Completed cards when the customer stores two cars.Expected result: The section header may read 0 documents, 2 contracts (or similar). Each card shows the correct vehicle on the agreement.
3
Download each signed PDF
Open each Completed card and click Download PDF when you need a copy for your files.Why this matters: Insurance, audits, and move-out checks often need the agreement that matches each VIN—not just one generic file.
Optional: staff send screen with multiple vehicles
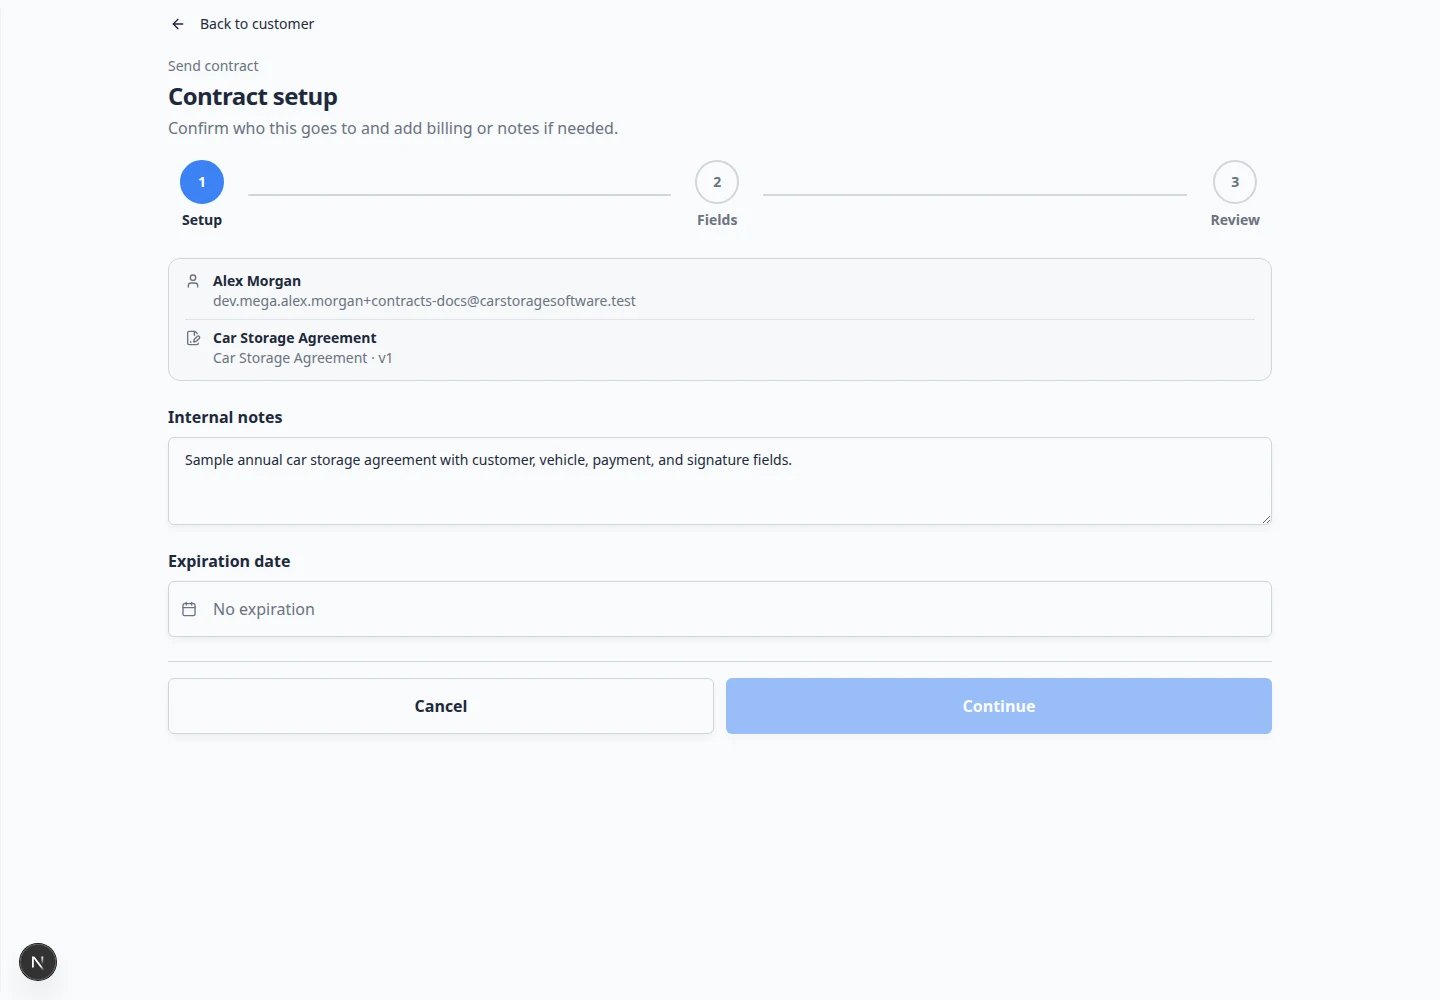
When staff send an agreement manually from a customer record, you may be able to select more than one vehicle on the Fields step of the send wizard. That path still sends one email when multiple cars are selected.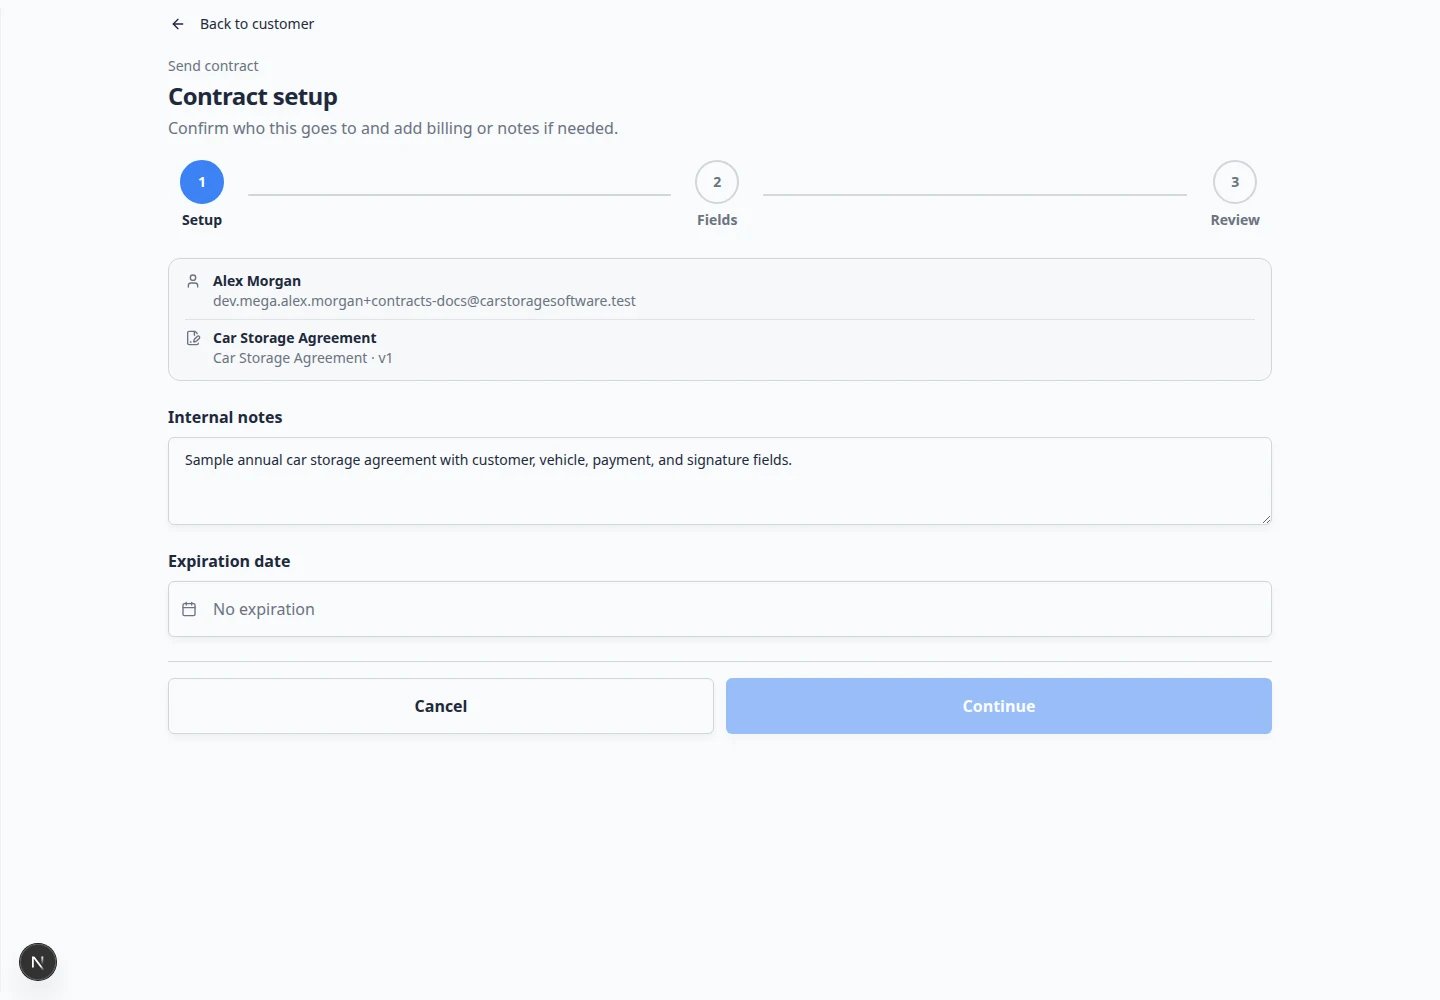
Onboarding vs manual sendOnboarding bundles agreements automatically when a customer has multiple cars and Contract Signing is enabled. Manual send from a customer record works one agreement at a time unless your template supports multi-vehicle selection on the Fields step—as shown above.
Staff sending outside onboarding
When staff send an agreement from Documents & Contracts on a customer record, each send creates one contract at a time through the Send contract composer. If a customer with three cars needs agreements today and is not going through onboarding:- Send the first agreement from their customer record and wait for signing, or
- Invite them to the portal so onboarding can bundle the agreements automatically.
What success looks like
- Customers with multiple vehicles see one Sign Your Contracts step during onboarding.
- They complete signing in one session without multiple emails per car.
- Each vehicle has its own Completed contract card on the customer record.
- Staff can download a signed PDF per vehicle.
Troubleshooting
What to do next
- Coach customers during first login: Help customers complete onboarding paperwork
- Send a single agreement outside onboarding: Send a contract for signature
- Download and verify signed files: Review signed contracts and document history