

What you will accomplish
You will create a quote—pricing the customer can review and approve before your facility sends a real invoice or starts expensive work. A quote is not the same as an invoice:Quote — “Here is what we propose to charge. Please review and approve.”Invoice — “This amount is ready to be paid now.”
Before you start
- An owner or admin has turned on Enable Quotes in Settings > Billing. See step 1 below if the Quotes page says quotes are not enabled.
- Payment processing is set up if you want customers to accept quotes online. See Connect payment processing.
- The customer already exists in Contacts.
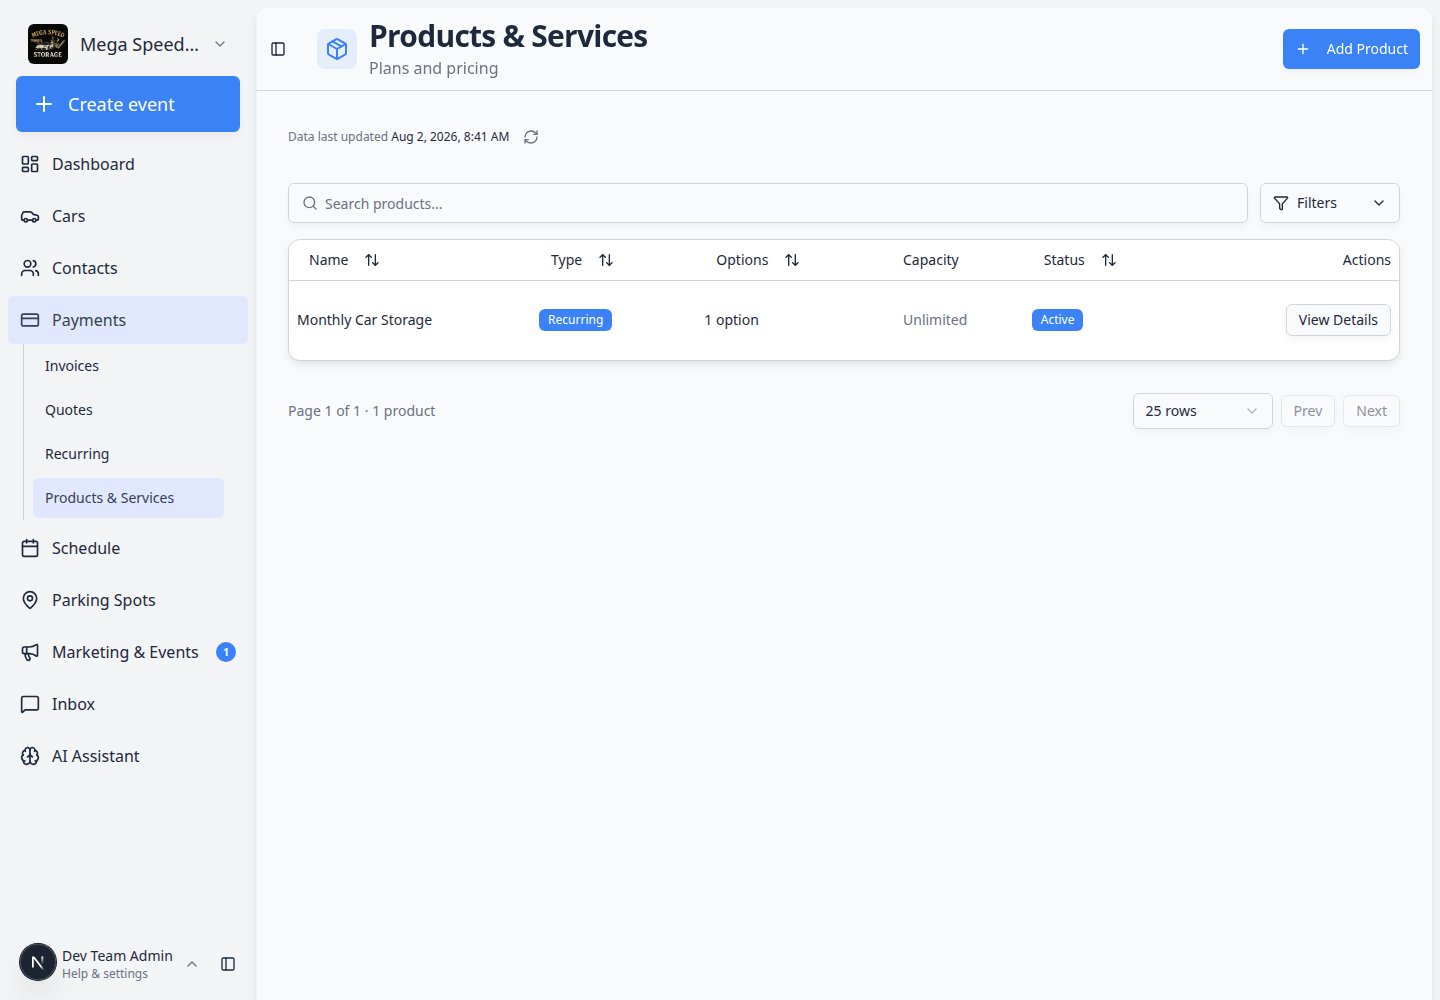
- At least one product with a pricing variant exists in Products & Services. Quotes pull prices from products—you cannot complete line items without them.
- Know what you are quoting (storage, detailing, transport, membership) and a realistic expiration date.
Step 1: Turn on quotes (one-time setup)
1
Open Settings > Billing
In the sidebar, click Settings, then Billing. You can also open Settings > Billing directly.
2
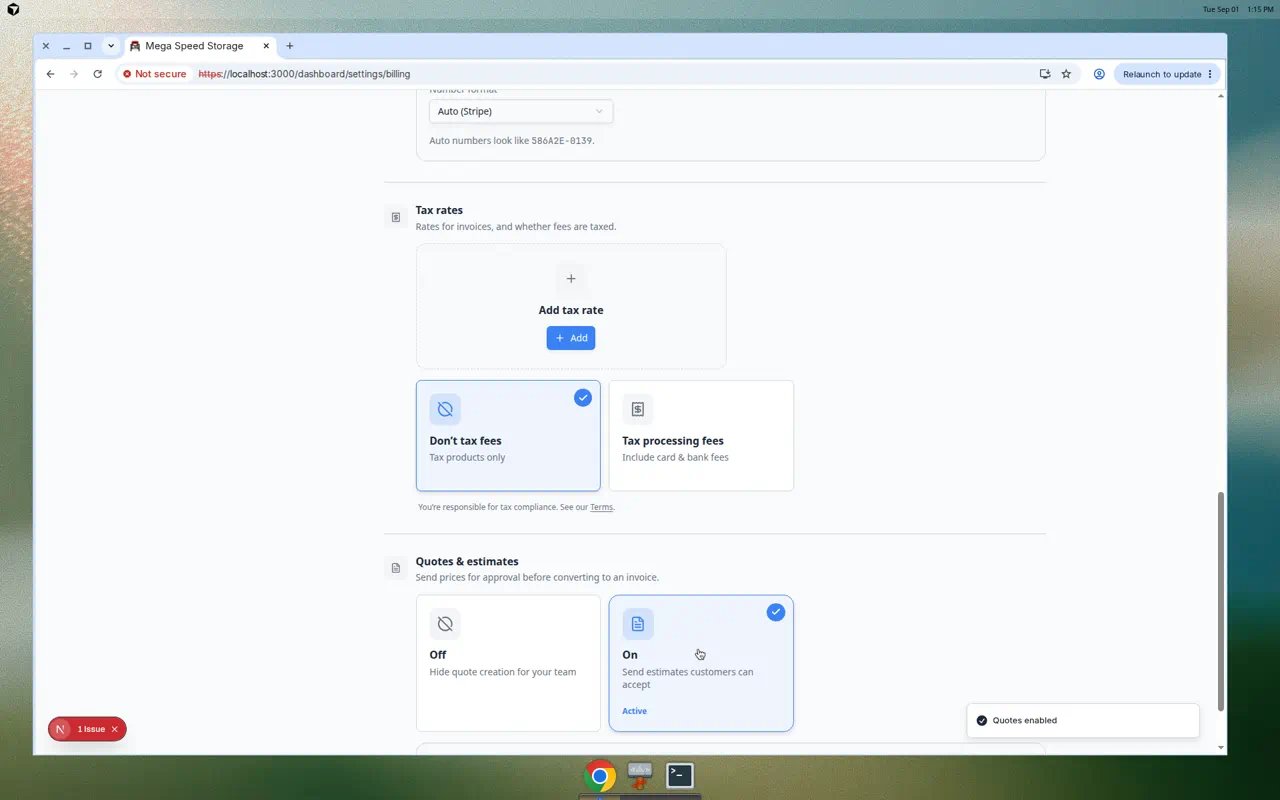
Find Quotes, Estimates & Proposals
Scroll to Quotes, Estimates & Proposals.
3
Turn on Enable Quotes
Switch Enable Quotes to on.Expected result: The setting shows as active. The Quotes page will show Create quote instead of a setup message.
Step 2: Open the Quotes page
Go to Payments > Quotes. The Quotes page lists each quote, the customer, status, total, and expiration date.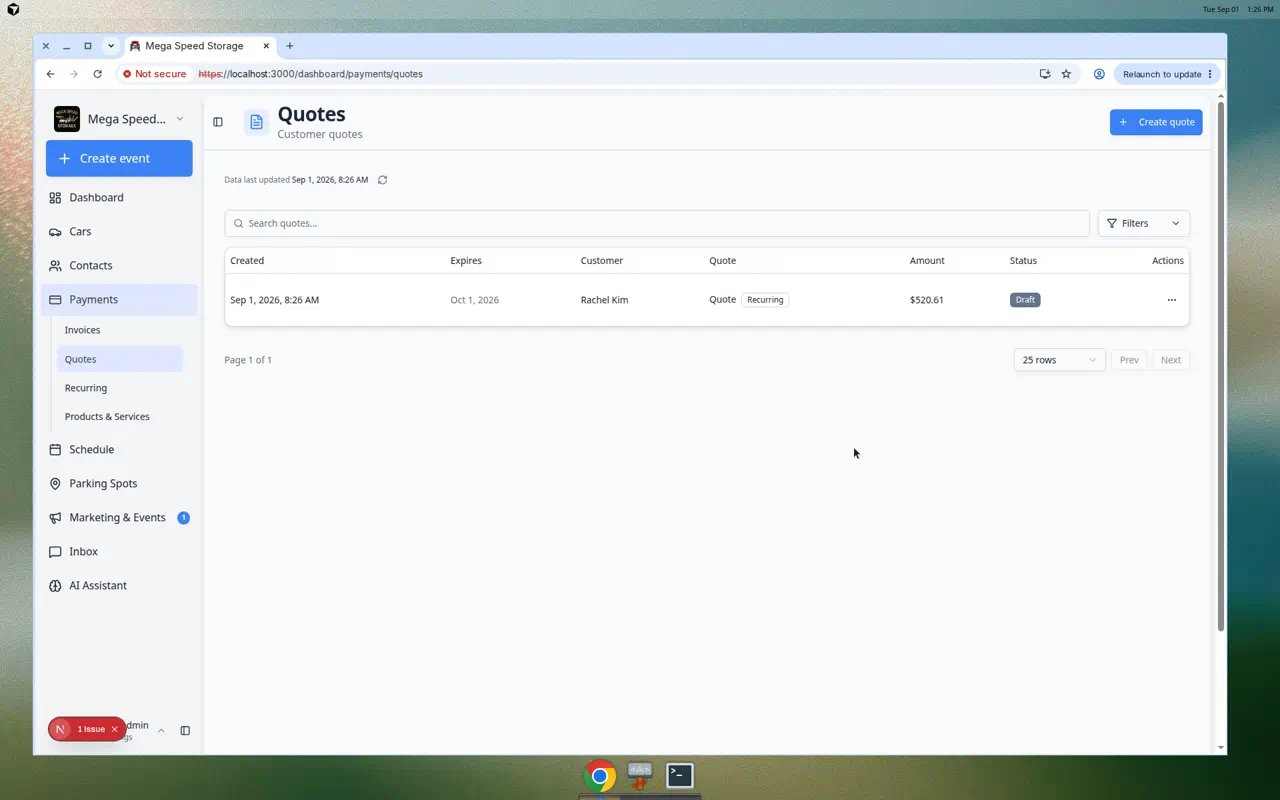
Step 3: Create the quote
1
Click Create quote
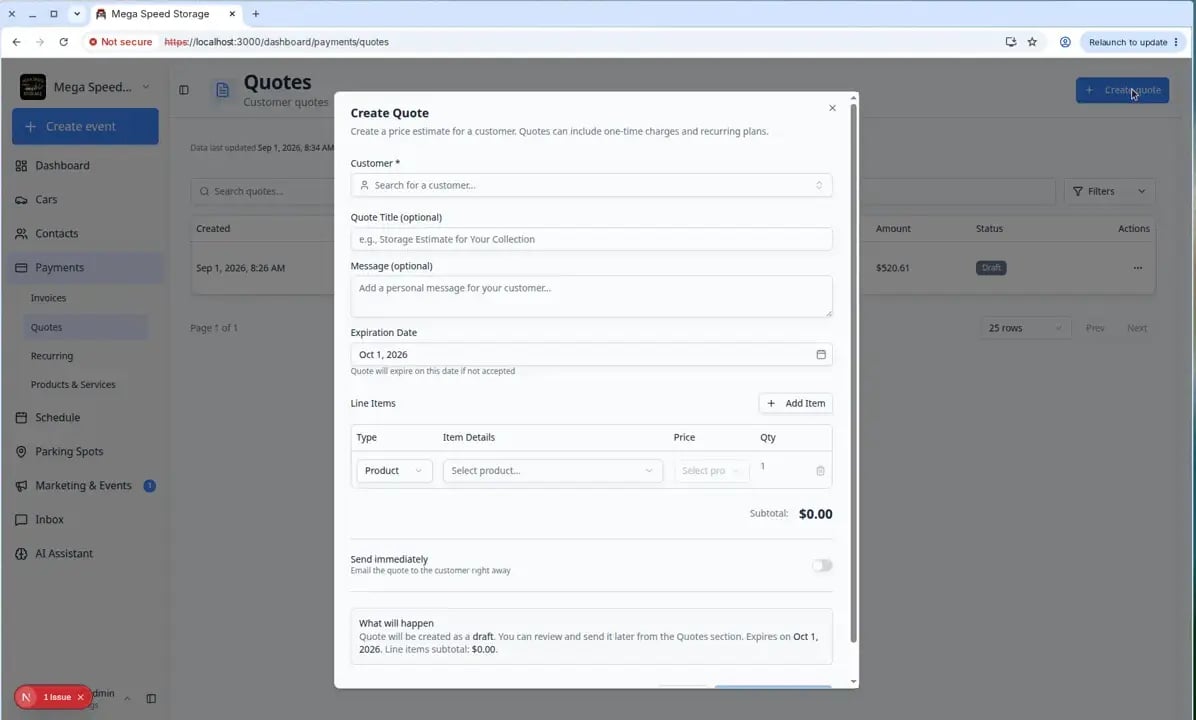
In the top-right area of the Quotes page, click Create quote.Expected result: A window titled Create Quote opens with the description: Create a price estimate for a customer. Quotes can include one-time charges and recurring plans.
2
Choose the customer
In Customer *, search for the customer and select the correct person or company.Expected result: The customer name and email appear below the field. If the customer is missing, add them in Contacts first.
3
Add a quote title and message (optional)
- Quote Title (optional) — short headline the customer will see (for example Winter Storage Package).
- Message (optional) — friendly note that appears with the quote.
4
Set the expiration date
Choose Expiration Date. By default the app may suggest a date about 30 days out.Why this matters: After this date, the quote should not be honored at old pricing.
5
Add line items
Under Line Items, click Add Item if you need more than one row.For each row:
- Type — usually Product
- Item Details — pick a product from Products & Services
- Price — pick the pricing variant (for example monthly or one-time)
- Qty — quantity (often 1)
6
Choose whether to email the customer now
Find Send immediately near the bottom.
- Off — saves a draft your team can review first. Click Create Draft Quote.
- On — emails the customer when the quote is ready. The button reads Create & Send Quote.
7
Confirm and save
Click Create Draft Quote or Create & Send Quote. You may see a short confirmation window that explains what will happen.If you chose Create & Send Quote, a second window asks Notify the customer? Choose Yes to send the quote email, or No to finalize without emailing. Closing the window cancels the send.Expected result: The quote appears on Payments > Quotes with status Draft or Open.
Review a quote you already created
Click a quote row on the Quotes page to open the quote detail page.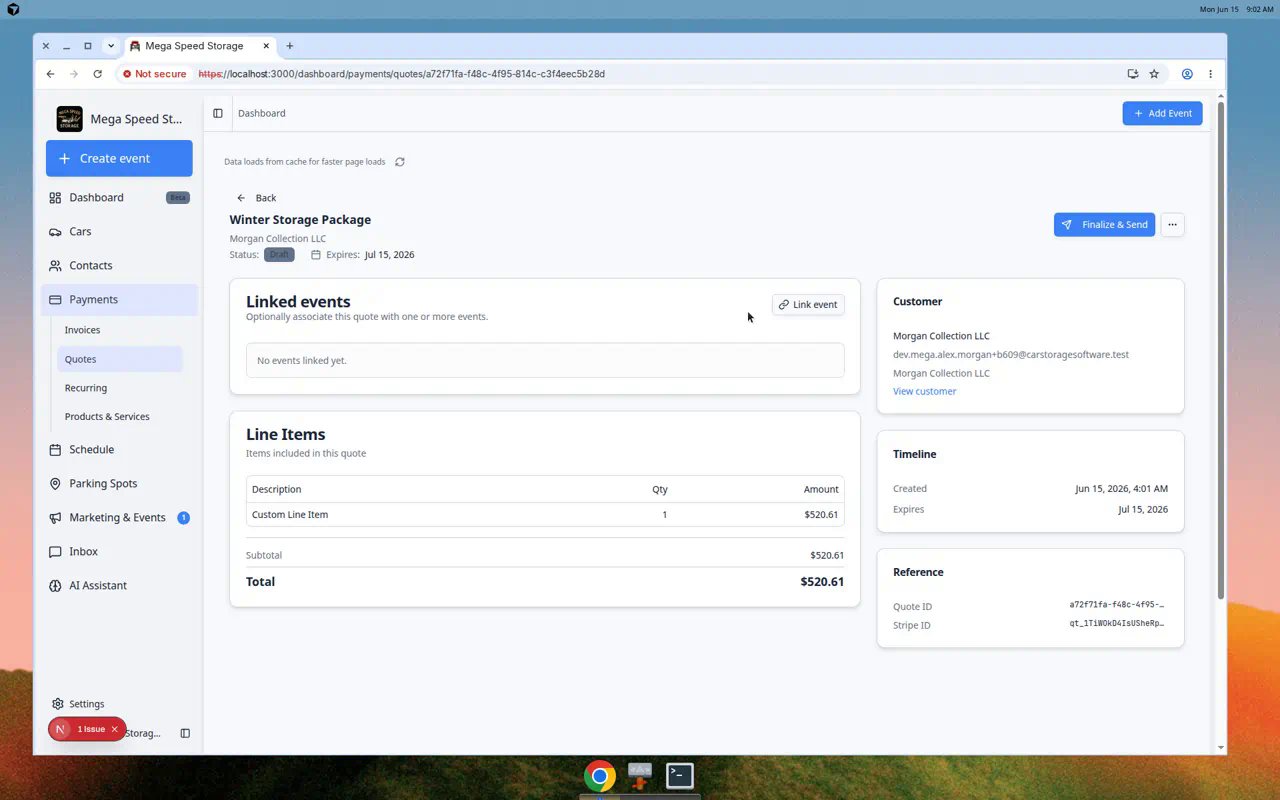
Draft quotes: finalize when ready
If you saved a Draft quote:- Open the quote from the list.
- Review totals and line items.
- Click Finalize & Send (or similar) when pricing is ready for the customer.
- When Notify the customer? appears, choose Yes to email the quote or No to finalize without emailing.
What each status means
Draft — your team is still editing. The customer has not been asked to approve yet.Open — the quote is finalized and the customer can review it.Accepted — the customer approved the quote.Canceled — your team stopped using this quote.Expired — the quote is past its expiration date.
Cancel a quote your team will not use
If pricing changed or the customer chose not to move forward, cancel the quote so your team does not bill from old numbers by mistake.1
Open the quote
Go to Payments > Quotes and click the quote row.Expected result: The quote detail page opens. Status should be Draft or Open—not Accepted.
2
Cancel from Actions
Click Actions (or the more-options menu) near the top-right, then choose Cancel quote (or similar).Why this matters: Canceled quotes stay in your history but customers should not accept them anymore.
3
Confirm
Confirm the cancellation when asked.Expected result: Status changes to Canceled. Create a new quote if the customer wants updated pricing later.
What success looks like
After you create a quote:- The quote appears on Payments > Quotes.
- Status shows Draft or Open depending on whether you sent it.
- Line items and total match what your team intends to charge.
- If sent, the customer can open the quote from email or the customer portal.
Tips for better quotes
- Use a short, friendly Quote Title that explains the outcome.
- Break large jobs into separate line items so the customer understands the total.
- Set a realistic expiration date so your team does not honor old pricing by mistake.
- Save as a draft when a manager still needs to review pricing.
Troubleshooting
Turn an accepted quote into billing
When a customer accepts a quote online, Car Storage Software usually creates the right billing record automatically. Your team does not need to click a separate Convert to invoice button on the quote page.One-time charges on the quote usually become a customer invoice on Payments > Invoices.Recurring charges on the quote usually become a recurring plan on Payments > Recurring.If the quote included both types, check both pages after the customer accepts.
What the customer does
1
Open the quote link
The customer opens the quote from their email or the customer portal.Expected result: They see line items, the total, and a way to accept the pricing.
2
Accept the quote
The customer reviews the pricing and accepts it online.Why this matters: Acceptance is the customer’s formal yes. After this step, your facility can bill based on what they approved.
What your team does after acceptance
1
Confirm the quote status
Go to Payments > Quotes and open the quote. Status should show Accepted.
2
Find the new invoice or recurring plan
- One-time work: Payments > Invoices — look for a new invoice for that customer.
- Repeat charges: Payments > Recurring — look for a new plan.
3
Collect payment or monitor the plan
- New invoice → Send and collect customer payments
- New recurring plan → Manage recurring billing
If you need to bill manually instead
Use this only when your manager asks you to create billing by hand (for example, the customer approved pricing over the phone).1
Open the accepted quote for reference
Keep the Accepted quote open so you can match line items and totals.
2
Create billing
- One-time work → Create an invoice
- Repeat charges → Manage recurring billing
3
Match amounts
Use the same customer, descriptions, and amounts from the accepted quote.