

What you will accomplish
You will tell the app which photos staff must take during an event—so intake, inspection, and service work always includes the proof your facility needs. Photo rules help staff know exactly which pictures to take during a workflow. For example, a storage intake event may require photos of the front, rear, driver side, passenger side, odometer, VIN, and any existing damage. A detail event may require before-and-after photos. Photo rules are configured inside an event type from Settings > Services & schedule → Set up or Advanced → Photo Documentation.Walkthrough photo behavior (per service)
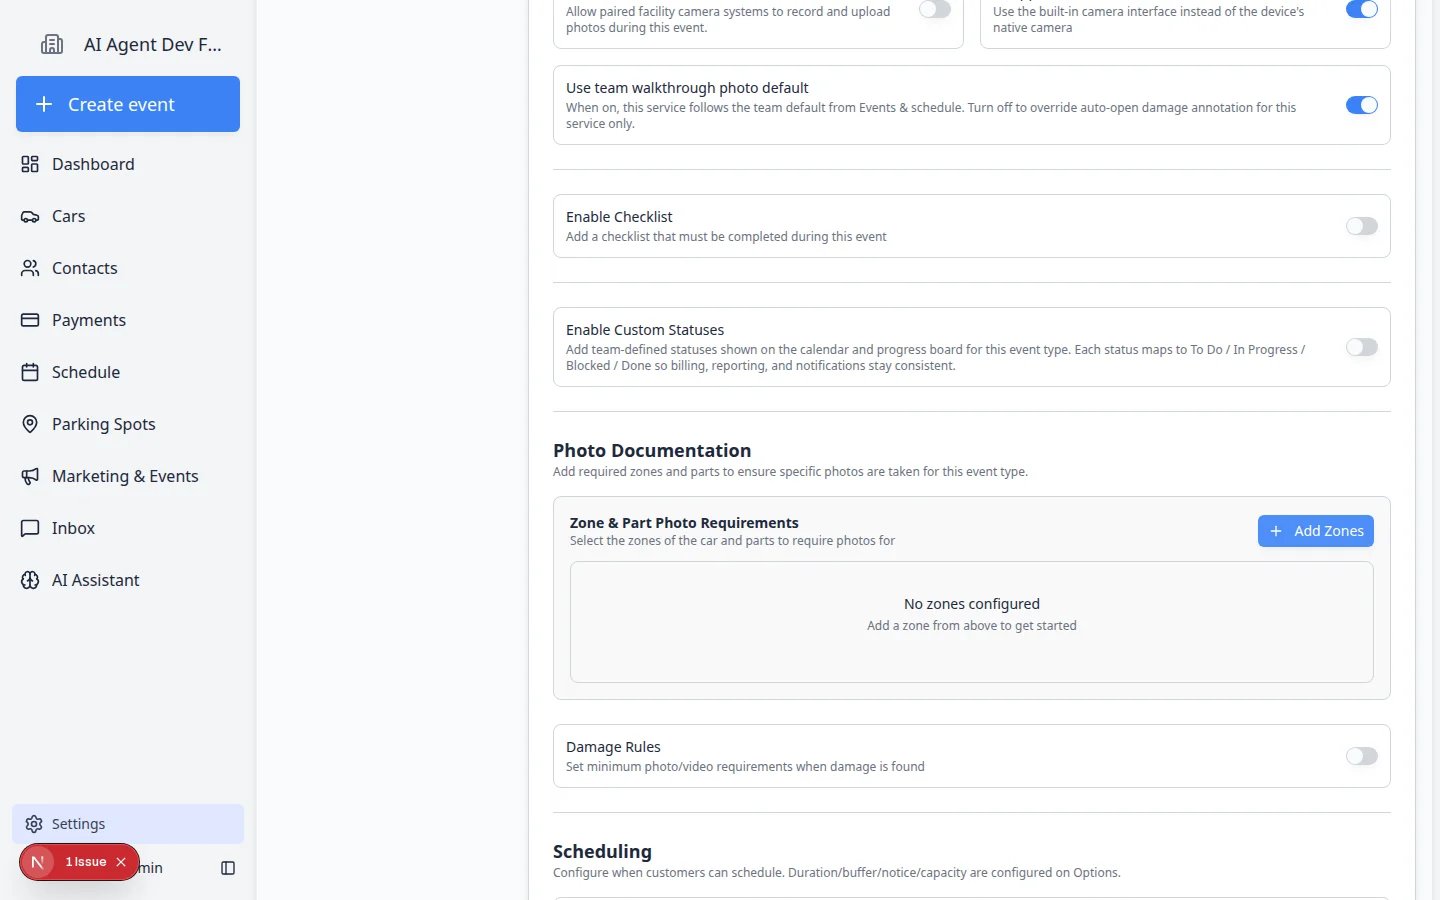
Each event type has its own Auto-open damage annotation switch under Photo Documentation. Turn it on for intake and inspection services; leave it off for services that only need simple zone photos.Walkthrough photos vs photo rulesPhoto rules (this guide) control which photos are required.Walkthrough photo defaults control how the camera behaves—for example whether the damage annotation tool opens automatically. See Configure walkthrough photo defaults.
Before you start
- Choose the event type that should require photos.
- List the vehicle areas your team should document, such as front, rear, driver side, passenger side, interior, odometer, VIN, or trunk.
- Decide which photos are required and which are optional.
- Decide whether staff should also record damage photos, videos, odometer, fuel level, or tire pressure.
- Make sure you have admin access to edit event type settings.
Open the event type
1
Open Services & schedule
Go to Settings > Services & schedule.Expected result: You see the list of event types your facility uses on the calendar.
2
Edit the event type
Find the workflow that needs photos (for example Storage Intake or Detail Appointment) and click Set up or Advanced.Expected result: The Edit Event Type page opens.
3
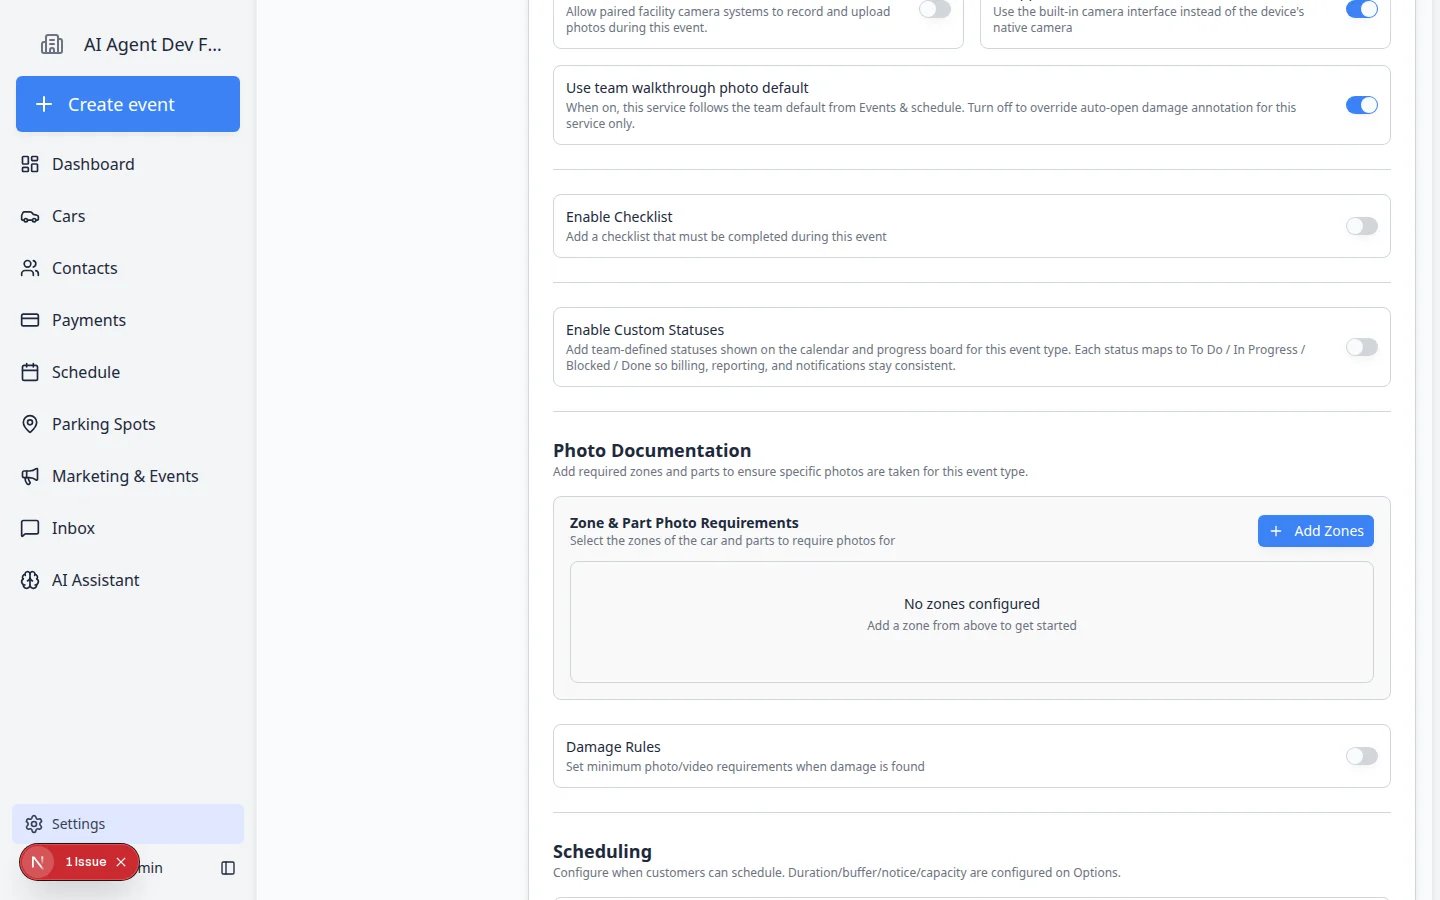
Scroll to Photo Documentation
Scroll to the Photo Documentation section.Expected result: You see Zone & Part Photo Requirements and an Add Zones button.
Understand zones and parts
Photo rules use two simple ideas:Zones are broad areas of the vehicle or workflow, such as Front, Rear, Interior, Driver Side, Passenger Side, or Documents.Parts are the specific photos needed inside a zone, such as Bumper, Windshield, Odometer, VIN Plate, Front Seat, or Existing Damage.Example: A Front zone might include Front bumper, Hood, and Windshield parts.
Add photo zones
1
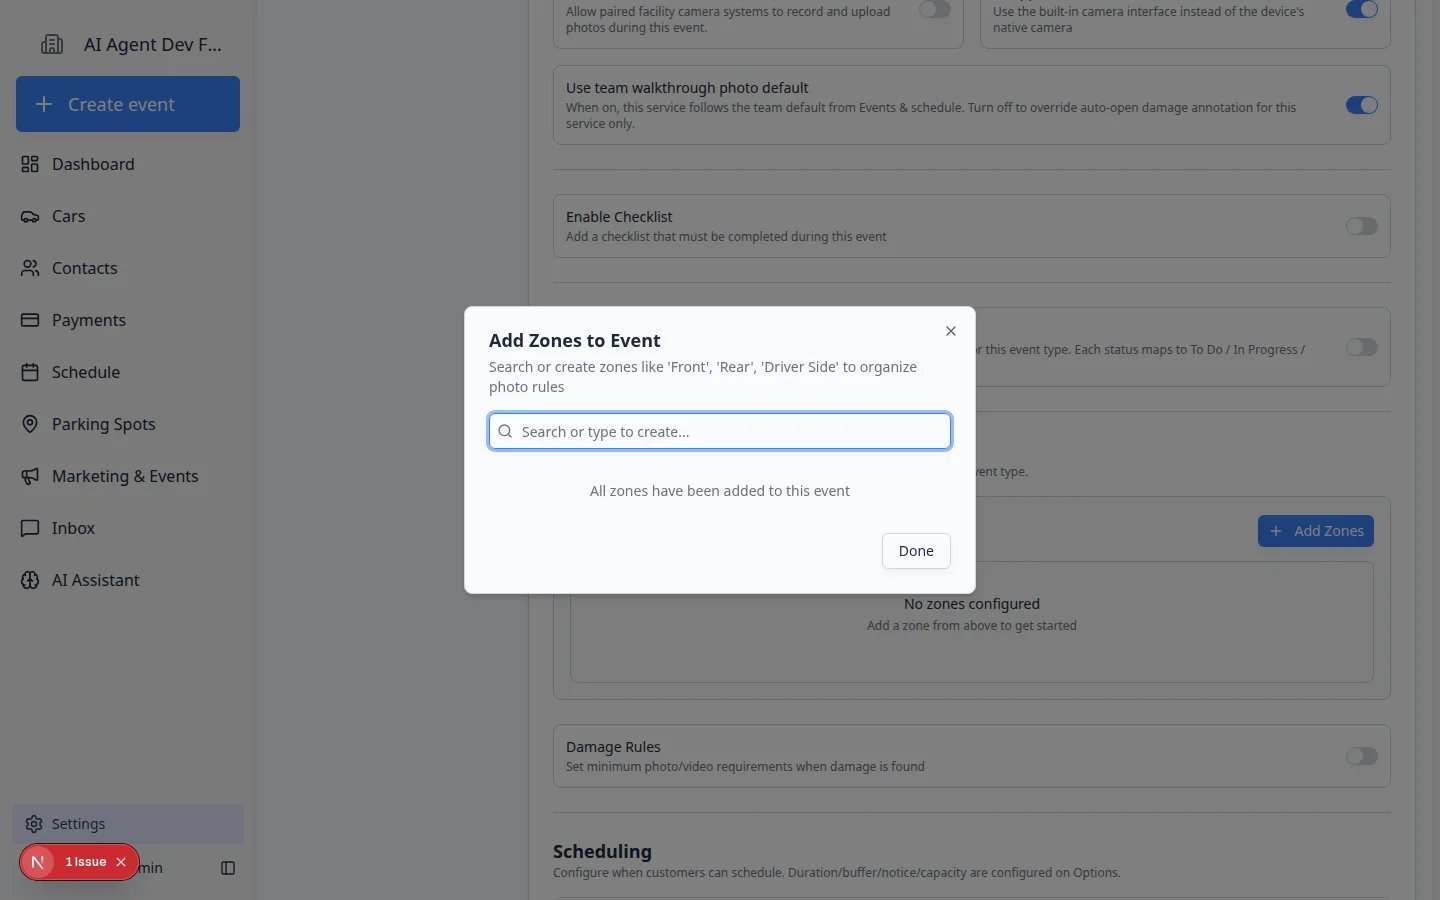
Click Add Zones
In Photo Documentation, click Add Zones.A window named Add Zones to Event opens.
2
Search for an existing zone
Type the zone name, such as Front, Rear, Interior, or Driver Side.If the zone already exists, select it from the list.
3
Create the zone if it is missing
If you type a new zone name, the app shows an option to create it. Click Create “[zone name]”.Use simple names your staff will recognize in the field.
4
Add all needed zones
Repeat the same process for each broad area you need documented.When you are finished, click Done.
Add photo parts to each zone
After you add at least one zone, tell the app which specific photos staff must take inside that zone.1
Open a zone
In Zone & Part Photo Requirements, click the zone you want to configure (for example Front).Expected result: The zone expands and shows any parts already listed, plus a button to add more parts.
2
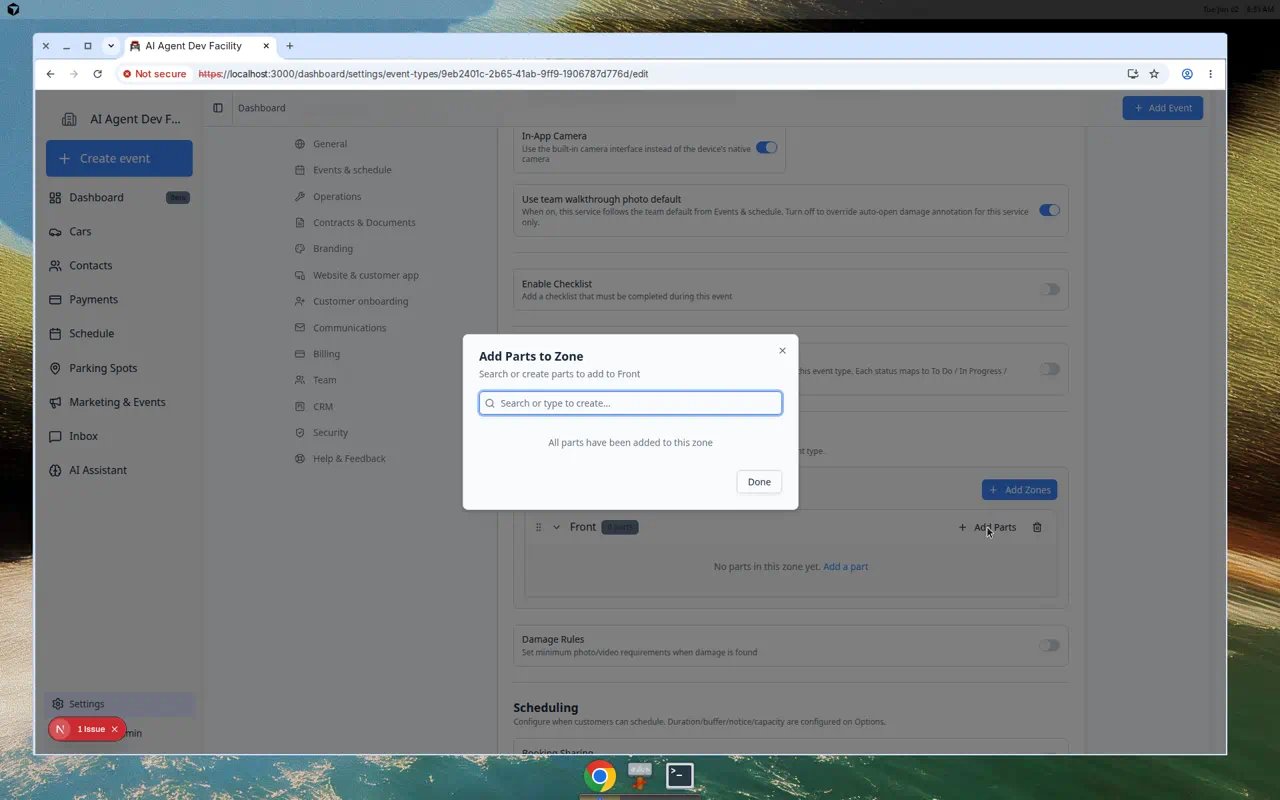
Click Add Parts
Click Add Parts (or the add button on that zone row).Expected result: A window titled Add Parts to Zone opens.
3
Search for or create the part
Type the part name, such as Bumper, Odometer, VIN Plate, Hood, Front Seat, or Existing Damage.Select an existing part from the list, or create a new one if your team has not used that name before.Expected result: The part appears in the list for that zone after you confirm your choice.
4
Choose required or optional
Mark important photos as Required so staff cannot finish the event without them.Use Optional for helpful images that are nice to have but not needed every time.Why this matters: Required photos protect your facility when you need proof of condition, mileage, or damage. Optional photos keep routine work from feeling overwhelming.
5
Add notes if staff need guidance
Add short instructions when a photo needs a specific angle or detail.Example: “Make sure the odometer reading is clear and readable.”Expected result: Staff see your note on their phone or tablet when they reach that photo step.
6
Repeat for each zone
Add parts to every zone you created. A common intake setup includes Front, Rear, Driver Side, Passenger Side, and Interior zones with the parts your team photographs every time.
Set walkthrough photo behavior (optional)
If staff capture photos during an event walkthrough (not just static zone photos), your facility can control whether the damage annotation tool opens automatically after each shot.1
Set the team default
Open the event type from Settings > Services & schedule, click Set up or Advanced, and turn Auto-open damage annotation on or off under Photo Documentation.Expected result: New walkthrough photos either open the markup screen right away or stay on the simple photo list—depending on your choice.Read Configure walkthrough photo defaults for the full steps.
2
Override one event type if needed
On the event type Edit page under Photo Documentation, turn off Use team walkthrough photo default when only one service (such as Storage Intake) needs different behavior.Why this matters: You can require damage markup at intake without forcing it on every quick customer visit.
Turn on extra documentation if needed
Some event types need more than regular photos. On the edit page, review these related options:- Damage Rules - set minimum photo or video requirements when damage is found.
- Odometer Reading Required - require staff to enter mileage.
- Fuel Level Required - require staff to record fuel level.
- Tire Pressure - capture tire pressure for all four tires.
- Video Upload - allow staff to upload videos during the event.
Save and test the event
1
Click Save Changes
After adding zones, parts, notes, and requirements, click Save Changes at the bottom of the event type page.
2
Start a test event
Start a test event from a car record or create a test appointment from Schedule.
3
Confirm staff see the prompts
Walk through the event and confirm the photo prompts appear in the order you expect.
4
Adjust anything confusing
If a prompt is unclear, return to the event type and rename the zone, rename the part, add a note, or change required versus optional.
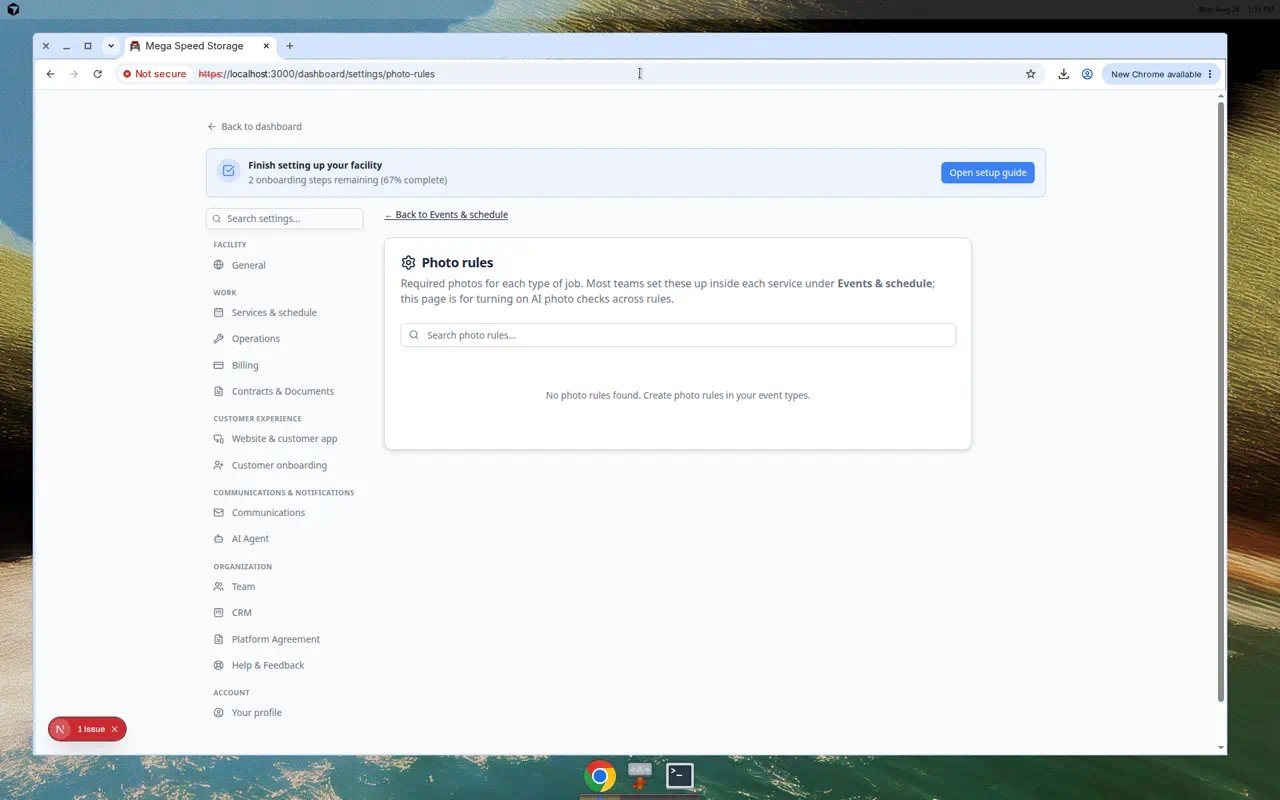
Photo rules page
The Photo rules page is mainly for reviewing photo rules and turning on AI photo checks when your team uses them. Most teams create and organize the required photo prompts from the event type edit page.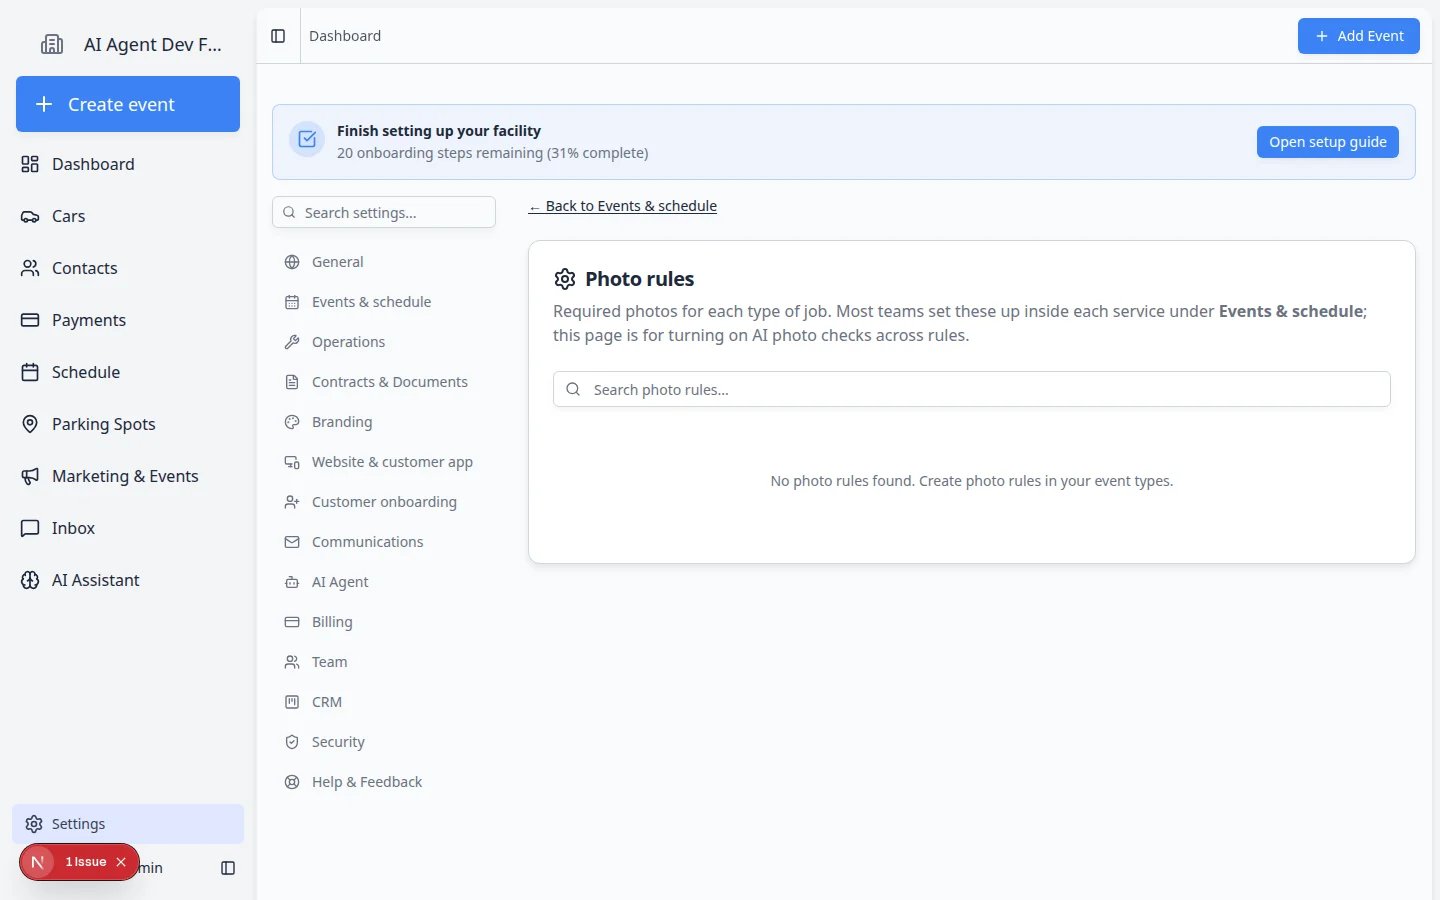
What success looks like
After photo rules are saved:- Staff see clear photo prompts during the event workflow.
- Required photos must be completed before the event is finished.
- Photos are attached to the correct vehicle or event record.
- Your team has stronger proof of vehicle condition, work completed, or damage found.
Tips for better photo rules
- Use short names like Front, Rear, Interior, and Odometer.
- Put photos in the order staff naturally walk around the car.
- Require only the photos your team truly needs every time.
- Add notes for photos that are often taken incorrectly.
- Test the workflow on a phone if staff will capture photos from mobile devices.