

What you will accomplish
You will add outside service providers to your facility, send them an invitation when they need to submit invoices, and understand how vendor records connect to vendor bills. Vendors are outside people or companies that help your facility. Examples include detailers, transport companies, mechanics, photographers, and contractors. For a Contacts-first walkthrough (opening Vendors in the sidebar and adding a partner), read Work with vendor contacts. Use Contacts > Vendors to keep vendor contact details, invitation status, and payment setup organized in one place. Vendor bills your facility receives are reviewed on Payments > Invoices using Filters → Type → Vendor.Vendor vs customer invoiceA customer invoice is money your facility collects from a customer. A vendor invoice is money an outside provider bills to your facility. This guide is only for managing vendor records—not customer billing.
ACH vendor payouts (Straddle)When Vendor ACH Payments is enabled for your team, connect your facility bank under Settings > Billing > Vendor Payments. Invited vendors connect their bank during onboarding so you can confirm ACH payments on vendor invoices. You can still Mark as paid for checks, Zelle, or other off-platform methods. See Review and pay vendor invoices.
Before you start
- Know the vendor’s business name (for example Premier Detailing or Summit Transport).
- Have an email address if you plan to send a portal invitation so the vendor can submit invoices online.
- Know which vendor types fit this provider (Detailing, Transportation, Mechanical, and so on).
- Ask your billing manager whether the vendor should finish payment setup before your team records payouts.
Open the Vendors page
1
Click Contacts in the sidebar
Sign in to your dashboard. In the left sidebar, click Contacts.Expected result: The Contacts area opens. You may see customer tabs such as Storage or Events near the top.
2
Click Vendors
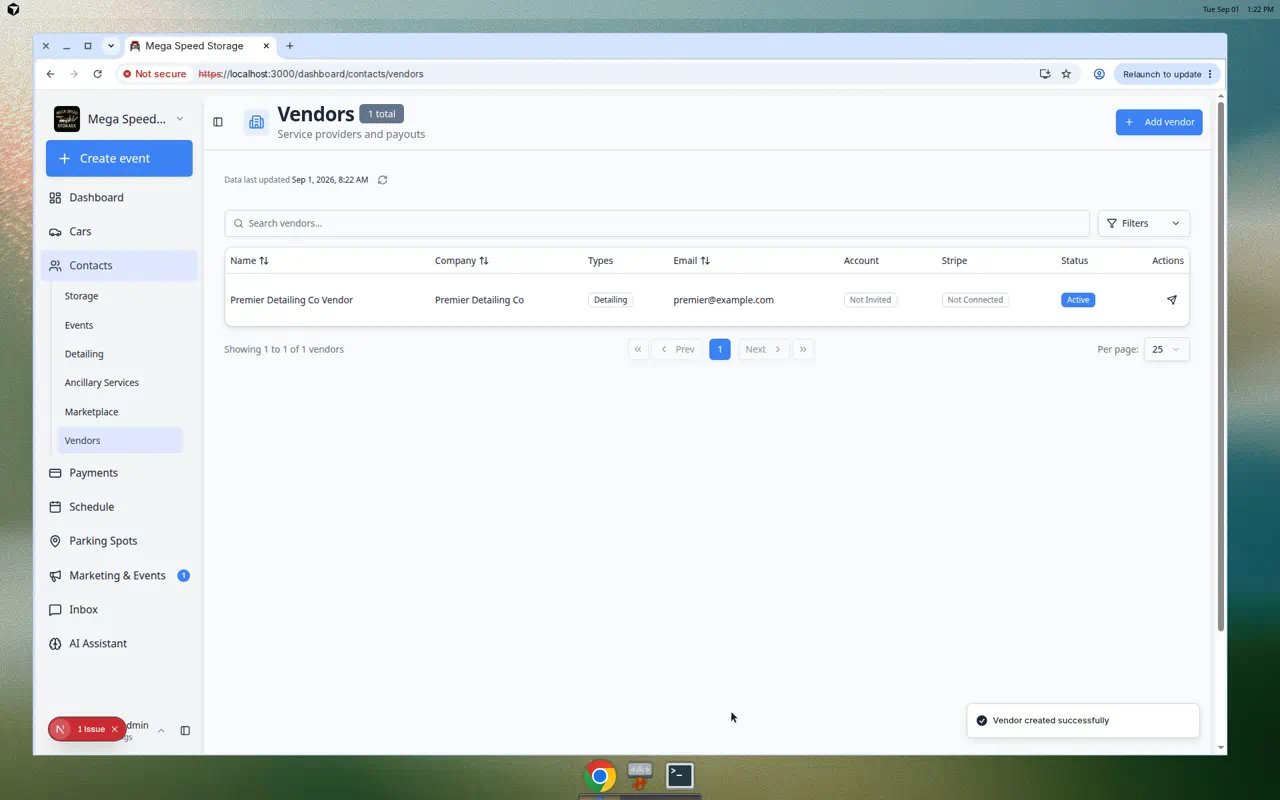
Click Vendors in the Contacts tabs (or submenu).You can also open Contacts > Vendors directly.Expected result: The page title is Vendors with the subtitle Service providers and payouts.
Add a vendor
1
Click Add vendor
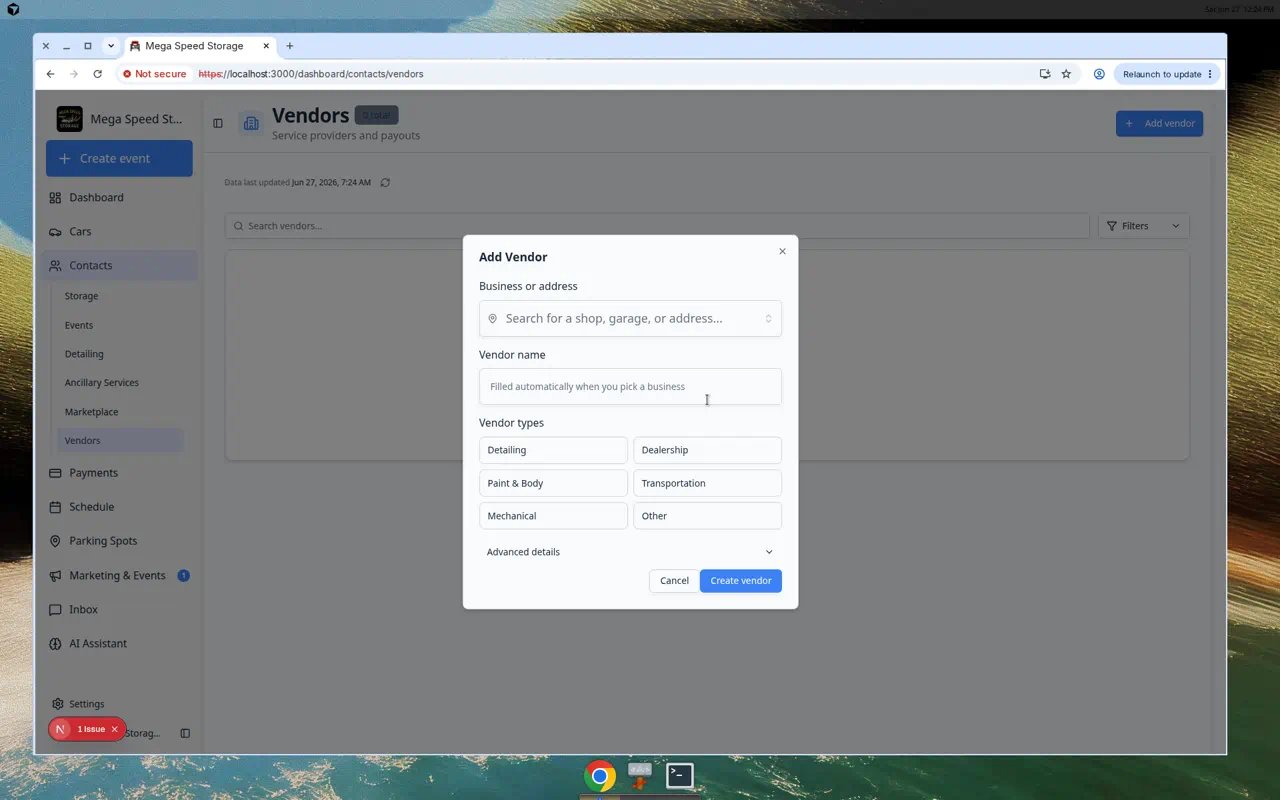
In the top-right area of the Vendors page, click Add vendor.If the list is empty, you may also see Add your first vendor in the center of the page. Either button opens the same window.Expected result: A window titled Add Vendor opens.
2
Search for the business or address (optional)
In Business or address, search for the shop, garage, or street address.When you pick a result, the Vendor name field may fill in automatically.Why this helps: Searching first saves typing and keeps the address consistent for your team.
3
Enter the vendor name
In Vendor name, type the name your staff will recognize (for example Elite Paint & Body).You can type the name directly even if you skip the business search.
4
Choose vendor types
Under Vendor types, click one or more labels that describe this provider, such as Detailing, Transportation, or Paint & Body.Why this matters: Types make it easier to filter and find the right vendor later.
5
Open Advanced details when you need contact info or an invite
Click Advanced details to expand optional fields:
- First name and Last name (optional)
- Email (needed if you will send an invitation)
- Phone and Notes
6
Click Create vendor
Click Create vendor.Expected result: The window closes and the vendor appears in the list with status Active. The Account column may show Not Invited until you send an invite.
Open a vendor record
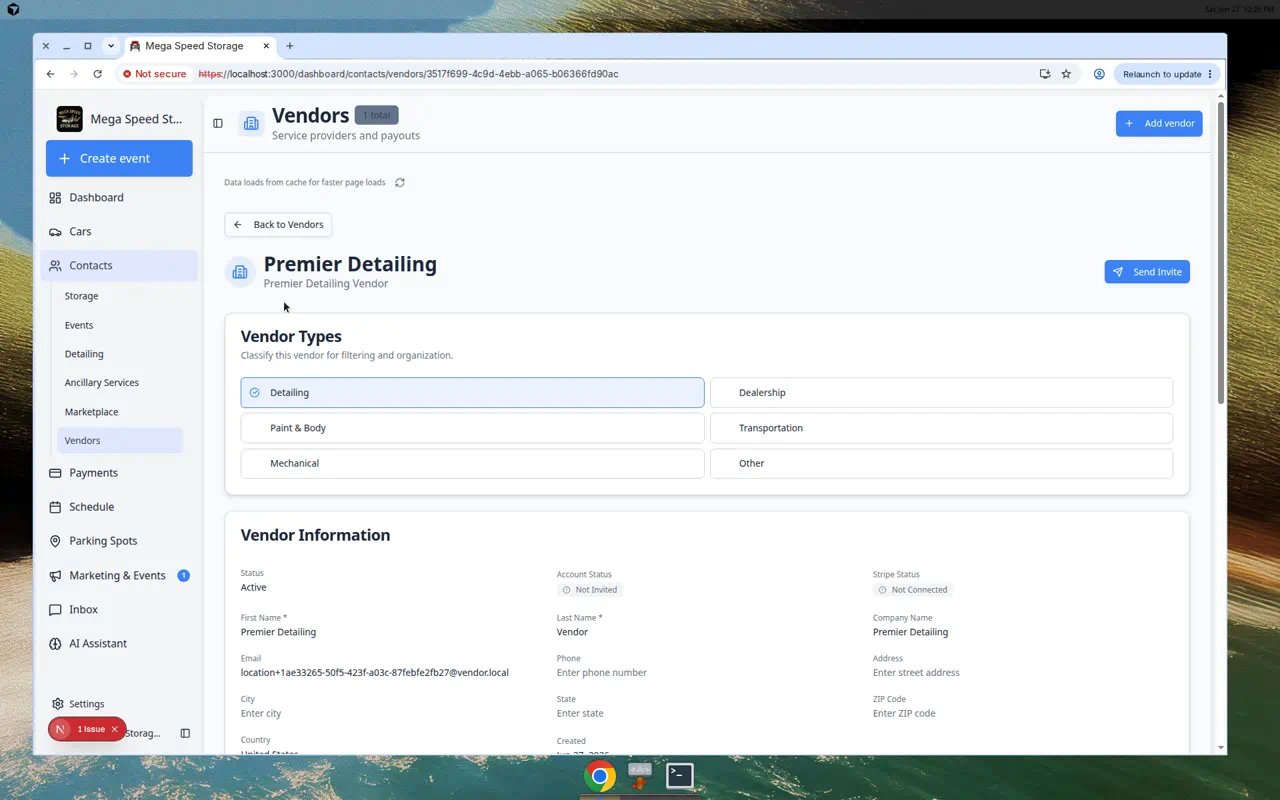
Click a vendor row on the Vendors page to open the vendor detail page. You will see:- Vendor Types — change how this provider is classified
- Vendor Information — status, account status, Stripe status, and contact fields you can edit
- Send Invite or Resend Invite — email the vendor portal link
Send a vendor portal invitation
When a vendor needs to submit invoices online or finish payment setup, send an invitation from the vendor detail page.1
Open the vendor
Go to Contacts > Vendors and click the vendor row.
2
Add or confirm the email
In Vendor Information, make sure Email is correct. Save any changes you make.Why this matters: The invitation goes to this email address. A typo means the vendor never receives the link.
3
Click Send Invite
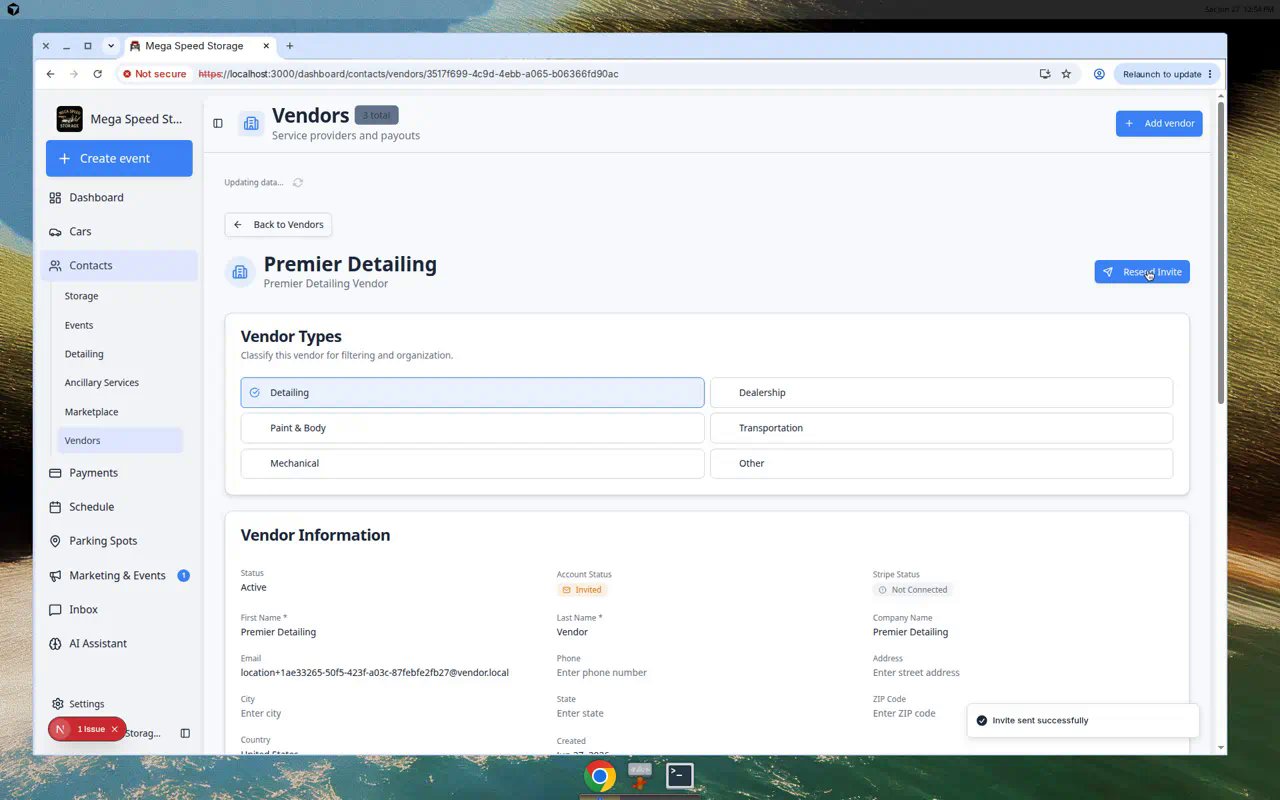
Click Send Invite in the top-right corner.Expected result: A success message appears. Account Status changes from Not Invited to Invited. The button may change to Resend Invite.
4
Tell the vendor what to expect
Ask the vendor to check their inbox (and spam folder) for the invitation. They use that link to access the vendor portal and submit invoices.Why this matters: Your team cannot review a vendor bill in the app until the vendor submits it—or until someone uploads it through your facility’s agreed process.
What the vendor statuses mean
Active means the vendor record is in use.Not Invited means no portal invitation has been sent yet.Invited means your team sent an invitation email.Not Connected (under Stripe) means payout setup is not finished. This is common right after you add a vendor.Connected means Stripe payout setup is ready when your facility uses online vendor payouts.
What success looks like
After you add a vendor:- The vendor appears on Contacts > Vendors.
- Vendor types and company name match how your team talks about this provider.
- If you sent an invitation, Account Status shows Invited.
- When the vendor submits a bill, your team can review it using Review and pay vendor invoices.
Common mistakes to avoid
- Do not look for Vendors under the Payments tabs—open Contacts > Vendors instead.
- Do not create duplicate records for the same company. Search the list first.
- Check the email address carefully before sending an invite.
- Use Notes (in Advanced details) for internal reminders, not private customer information.
Troubleshooting
When a vendor will bill your facility
1
Confirm the vendor record is correct
Open the vendor from Contacts > Vendors and check the company name and email.Why this matters: Vendor invoices are easier to match when the vendor record is accurate.
2
Send an invite if they submit bills online
If the vendor will upload invoices through the portal, click Send Invite or Resend Invite on the vendor detail page.Expected result: The vendor receives an email with steps to submit invoices your team can review.
3
Review bills when they arrive
When a vendor submits an invoice, open Payments > Invoices, open Filters, choose Vendor under Type, and follow Review and pay vendor invoices.